
Plastering Projects London
Real plastering projects completed across London. Walls skimmed, ceilings repaired, houses transformed.
Kitchen Wall Strip & Re-Skim – Camden, NW1
Camden, London
The scope of this project covered the full strip and re-skim of the kitchen walls. The existing painted plaster was hacked off back to the bare brick substrate, removing all failing surface material before new plaster was applied. The ceiling Artex was not removed but was left in place, suggesting the ceiling re-skim was either handled separately or was outside the scope of this visit. The primary work involved preparing the exposed brick walls, applying a bonding coat to create a suitable surface for the finish plaster, and then skimming the walls to a flat, smooth surface ready for decorating. Work was carried out around the existing fitted kitchen units, which remained in position throughout, requiring careful cutting-in around cabinet edges, the window reveal, and the coving line at ceiling level. The finished result — visible in the bottom-right panel — shows the walls brought back to a clean, flat plastered surface consistent with the surrounding cabinets and coving. The kitchen is left in a paint-ready condition with the fitted appliances undisturbed.
View Case StudyKitchen & Rear Room Re-Skim – Hackney, E8
Hackney, London
The scope of work covered a complete re-skim of all four walls and the full ceiling within this ground-floor rear room. Given the mixed substrate — areas of old sand and cement plaster sitting alongside sections of exposed bare board and previously patched surfaces — the prep and skim approach had to be adapted per surface rather than applied uniformly. The ceiling required particular attention due to its uneven condition and the visible tonal variation from previous partial repairs. All electrical chase lines chased into the walls by the electrician during the rewire phase were filled using bonding compound and allowed to dry fully before the skim coat was started. Window reveals on both window openings were also included in the scope, with each reveal neatly skimmed flush with the surrounding wall face. The entire ceiling was skimmed in a continuous pass to achieve consistent coverage across the full plane, with no joins or overlap lines left visible. The total working area across walls and ceiling across this room was approximately 40–50 square metres.
View Case StudyCeiling Replacement & Wall Re-Skim in Hillingdon UB8
Hillingdon, London
The scope of work covered a full ceiling replacement across the affected rooms in this Hillingdon Victorian terraced property. The work included: - Supply and fix of 12.5mm tapered-edge plasterboard to new metal C-stud ceiling framework, spanning the full width of each room - Boarding around existing lighting wiring drops already chased in by the electrician - Timber batten installation to secondary ceiling areas to provide a level fixing surface for plasterboard - Full skim coat to all newly boarded ceilings using British Gypsum Multi-Finish plaster - Re-skim of all walls throughout the affected rooms, including patching at the ceiling-to-wall junction where the old plaster had lifted and torn away - Joint taping and jointing compound applied to all plasterboard butt joints and tapered edges prior to finishing coat - Floor and surface protection laid throughout using dust sheets and polythene sheeting - All mineral wool insulation checked and tucked back neatly before boards were fixed to prevent cold bridging at edges
View Case StudyCeiling Overboarding & Re-Skim in Sutton
Sutton, London
The full scope of work involved three distinct stages: stripping, overboarding, and skimming. First, all loose and delaminated plaster was removed from the ceiling surface to provide a stable substrate for boarding. Where sections of old plaster remained bonded, these were tested by hand to confirm they were sound. Any hollow or suspect areas were cut back fully. Once the ceiling was cleared and prepared, new 9.5mm plasterboard sheets were fixed directly to the existing joists using drywall screws at regular centres, ensuring the boards were pulled tight and level. Joints between boards were taped with scrim mesh tape to prevent future cracking along the board edges. The bottom-right photo confirms the new plasterboard fixed in a grid pattern with boards clearly visible and the pendant light rose accommodated within the new board layout. Following the boarding stage, the entire ceiling received a scratch coat of Thistle multi-finish plaster, worked flat with a steel trowel. Once the scratch coat had firmed sufficiently, a finishing coat was applied and trowelled to a smooth, flat surface. The top photo shows the completed skim coat — the ceiling is fully covered in fresh plaster, trowelled to an even finish ready for mist coat and decoration.
View Case StudyCeiling Repair & Re-Skim in Hammersmith and Fulham
Hammersmith and Fulham, London
The scope of work covered the complete replacement and skimming of the kitchen ceiling in this Hammersmith and Fulham terraced house. The existing ceiling substrate had been stripped during renovation, leaving the joists exposed and requiring new plasterboard to be fitted before any skim work could begin. Our team fitted new 12.5mm tapered-edge plasterboard directly to the ceiling joists, ensuring all boards were correctly noggled and the joins were staggered to prevent cracking. Pre-cut apertures were left for the recessed LED downlighters already wired in by the electrician — these required clean, accurate cuts to ensure the fittings would sit flush once the skim was applied. Once the boards were secured and all joints taped with scrim mesh tape, the ceiling received a bonding PVA wash to ensure good adhesion for the multi-finish skim. Two coats of British Gypsum multi-finish were applied — a scratch coat to build up the surface and a tighter finishing coat to close the plaster and produce a flat, even surface. The finished skim extended across the full ceiling plane, from wall to wall, with the recessed downlighter holes remaining clean and accurately sized for the electrician to complete the final fit-off.
View Case StudyLath & Plaster Ceiling Replacement & Wall Re-Skim in Lambeth, South London
Wandsworth, London
The scope covered full ceiling replacement in the bedroom, removing all failed lath and plaster down to the joists, followed by the installation of new 12.5mm plasterboard fixed directly to the ceiling joists, taping all board joints with fibreglass mesh tape, and applying a full two-coat skim across the entire ceiling surface. The walls in the same room also required a full re-skim, with the existing painted plaster surface prepared and skimmed with Thistle multi-finish plaster to provide a clean, paint-ready surface. All board joints and screw fixings were covered with jointing tape and bonding compound before skimming commenced. The first image shows the plasterboard installation in progress, with all joints taped using orange fibreglass mesh tape and screw heads clearly visible across the new boards. The second image shows the re-skimmed walls mid-cure, already presenting a smooth, uniform surface. The third image shows the completed ceiling after the two-coat skim had been applied and was in its final drying stage, with the pendant light drop visible through the centre of the ceiling — confirming the full ceiling area had been plastered from wall to wall.
View Case StudyCeiling Replacement & Wall Re-Skim in Newham, E6
Newham, London
The scope of work for this front reception room was extensive, covering both ceiling and all four walls from scratch. Starting from the top, new 12.5mm plasterboard was to be fixed directly to the exposed ceiling joists to create a flat, level substrate ready for skimming. Once the ceiling was boarded and skimmed, attention turned to the walls. With all plaster removed down to bare brick, each wall required a full sand and cement scratch coat or bonding coat to build up the base layer before a finishing skim could be applied. The curved bay window alcove needed individual treatment — the arched plaster surround was carefully profiled and the inset walls skimmed to follow the curve cleanly. The arched reveal between the main room and bay also required plastering to maintain a consistent line with the surrounding walls. Working around the existing radiator and skirting board positions was factored into the plan from the outset. The full scope included: new plasterboard ceiling fixed to joists, full ceiling skim, bonding coat to all bare brick walls, finishing skim coat to all walls, and plastering of the bay window reveal and arched surround. The project required a minimum of two plasterers working across two to three days to maintain a workable schedule.
View Case StudyLath & Plaster Ceiling Replacement & Wall Re-Skim in Richmond upon Thames, TW9
Richmond upon Thames, London
The full scope of work for this bedroom in Richmond upon Thames covered two main areas: complete ceiling replacement and full wall re-skimming throughout the room. For the ceiling, the original lath and plaster construction was stripped entirely back to the bare joists. All loose laths, dried lime plaster debris, and dust were cleared from the ceiling void and the joist faces cleaned down. New 12.5mm tapered-edge plasterboard sheets were then fixed directly to the ceiling joists using drywall screws at the correct centres, with all board joints staggered to avoid continuous lines across the ceiling plane. Scrim tape was applied over every board joint and internal angle, and corner tape was used at the ceiling-to-wall junction. The full ceiling was then skimmed in Thistle Multi-Finish plaster, bringing it to a smooth, flat surface. For the walls, the existing painted plaster was assessed for soundness. The surface was abraded and a coat of diluted PVA bonding agent applied across all four walls to stabilise the substrate and improve adhesion before skimming. Each wall then received a scratch coat of Multi-Finish plaster, which was ruled off to remove high spots, followed by a finishing coat trowelled to a smooth, paint-ready surface. All internal angles were straightened using a clean angle trowel and the wall-to-ceiling junction was carefully finished throughout.
View Case StudyWall Skimming & Re-Skim After Rewire in Hounslow, TW3
Hounslow, London
The scope of work covered the full replastering of one stripped masonry wall using a bonding undercoat followed by a multi-finish skim, alongside a re-skim of the remaining walls in the room that had been disrupted by the rewire. The stripped wall — running from floor to ceiling and spanning the full width of the chimney breast zone — required a bonding coat build-up to bring it level with the existing plaster depth on adjacent surfaces. Two electrical back boxes were incorporated into the bonding coat layer, with the cables neatly set back. A metal angle bead was fixed vertically along the right-hand return of the wall to create a clean, straight arris edge where the new plaster would terminate. The chased cable runs were filled and allowed to dry before the bonding coat was applied in a single uniform layer and scratched with a devil float to create a mechanical key for the finish coat. All remaining walls in the room received a fresh skim of multi-finish plaster, with PVA applied first to the previously painted surfaces to stabilise suction and ensure adhesion. The scope also included tying the new work neatly into the existing ceiling line and door architrave.
View Case StudyFull House Re-skim & Media Wall Plastering in Ealing, W5
Ealing, London
The full scope of work on this project centred on the living room of a period property in Ealing and covered three main areas of plastering. First, the ceiling required patching around a series of recessed downlighter apertures — approximately six to eight square cut-outs that had been left proud or recessed after the lighting contractor completed their work. Each patch needed to be brought flush with the surrounding ceiling surface before a final skim coat could be applied across the entire ceiling plane. Second, the newly constructed media wall required a full skim across all its plasterboard faces. This included the flat face of the media wall itself, the interior faces of each display alcove recess — left side stack of three alcoves, right side stack of three alcoves, and the large central TV recess — as well as the reveals and returns on each opening. The fireplace recess surround also required plastering to the inner reveals. Third, the adjacent walls in the living room that had been re-lined or patched as part of the wider renovation needed re-skimming to match the new media wall. The overall scope required careful sequencing so that the ceiling patches were completed and tightened before the ceiling final skim, and the media wall skim was timed to allow adequate drying time on the bonding coat beneath.
View Case StudyFull House Re-skim in Barnet, EN5
Barnet, London
The full house re-skim at this Barnet property covered walls and ceilings across multiple rooms, including at least one main bedroom and a reception or hallway area. The scope included stripping back failed or textured ceiling surfaces where required, preparing exposed timber batten substrates for replastering, and applying a bonding coat followed by a multi-finish skim to achieve a flat, paint-ready surface. Where new plasterboard sections had been inserted — visible as light-coloured rectangular panels recessed into the batten framework — these were incorporated flush with the surrounding substrate before skimming commenced. The bedroom ceiling received a full bonding and skim coat, which was captured mid-application showing the fresh wet plaster spread across the entire ceiling plane. Walls in the same room had been previously skimmed and were dry, forming a neutral cream base ready for decoration. The scope also included working carefully around the original plaster cornice in the reception room, which was retained and protected throughout the process. Electrical fittings including a pendant light rose were masked off or worked around during each room's skim. The overall aim was to bring all internal surfaces across the property to a consistent flat finish ready for the client's chosen decorator.
View Case StudyCeiling Patch Repairs & Re-Skim in Kensington West London
Harrow, London
The scope of work across this property centred on repairing multiple sections of ceiling that had been cut open during first-fix electrical works, then skimming the repaired surfaces to a paint-ready finish. The key tasks visible across the four images included: cutting new plasterboard patches to fit the open rectangular and square voids left by the electrician, fixing those patches back to the existing timber noggins using screws at regular centres, taping and jointing the board edges and screw indentations prior to skimming, applying a full skim coat of Thistle multi-finish across the repaired ceiling panels and the surrounding ceiling surface to create a consistent plane, and working around existing downlighter apertures and ceiling rose positions without disturbing the electrical rough-in. The stepped or recessed ceiling design — visible in the coving and ceiling perimeter detail — also required careful plastering into the internal angles and along the coving returns to maintain clean, straight lines. Walls adjacent to the ceiling were also in a freshly skimmed state, suggesting wall re-skimming was part of the wider scope, though ceiling patching and re-skimming was the primary focus captured in the photos.
View Case StudyFull House Re-skim & Ceiling Replacement in Redbridge, IG1
Redbridge, London
The scope of work on this Redbridge property covered two primary trades elements: full ceiling replacement where the original lath and plaster had either been removed or had collapsed, and a full wall re-skim programme throughout multiple rooms. Starting with the ceiling, the old lath boards were stripped back completely in the affected areas, leaving the original timber joists exposed and ready to receive new plasterboard. New 12.5mm tapered-edge plasterboard sheets were then measured, cut, and fixed directly to the ceiling joists using drywall screws at appropriate intervals. All board joints were covered with fibreglass scrim tape to prevent future cracking along the joints. A mesh self-adhesive patch was applied over a smaller cut-out void in the ceiling board. Metal stop bead was installed along the vertical edges of the new plasterboard to create a clean, defined arris. On the walls, the existing plaster surface — where still intact — was assessed for suction and adhesion. Where the surface was sufficiently stable, it was pre-treated with a diluted PVA bonding solution to control suction before skimming. The large blow-out section visible in image four required more substantial repair: the remaining loose and cracked plaster around the void was cut back to a clean edge, and the exposed lath was used as a substrate for the repair plasterboard patch before the entire wall surface was re-skimmed. Each wall received a scratch coat of British Gypsum multi-finish plaster followed by a tightened finishing coat to produce a flat surface ready for decoration.
View Case StudyWall Skimming & Re-Skim in Lewisham, SE13
Lewisham, London
The scope of work covered the complete re-skim of all four walls in the main reception room, alongside the full plastering of the newly built concrete block chimney breast from scratch. The chimney breast required a two-coat sand-and-cement scratch coat system before any finish skim could be applied, given the dense and highly porous nature of the blockwork. The flanking walls to the chimney breast, which retained partial sections of the original sand-and-cement render, needed to be levelled with bonding coat where the old plaster had been hacked away, before the entire wall face could receive a continuous multi-finish skim coat. All four main room walls required the remaining loose plaster fragments to be removed, any deep voids filled with bonding compound, and the wall surface treated with a diluted PVA bonding agent to regulate suction before skimming. The area around the rewiring channels near the consumer unit was carefully filled and set hard prior to the main skim to prevent cracking along the electrical chase lines. Plasterboard sheets visible in the photos — stacked ready for use — suggest that certain sections of the ceiling or partition areas were scheduled to receive dry-lining as part of the broader renovation, though the main wall plastering was the primary scope for this visit. The chimney breast recess opening and its surrounding reveals were also to be plastered on all internal faces.
View Case StudyMedia Wall Plasterboarding & Skim in Greenwich, SE10
Greenwich, London
The scope of work on this project covered the full plasterboarding and skim coat of a bespoke media wall structure in a Greenwich living room. The work included: - Fixing 12.5mm tapered-edge plasterboard to all external faces of the timber stud media wall frame, including the flat front face, top soffit, and both side returns - Cutting and fitting plasterboard neatly around both the upper TV recess and the lower fire opening, maintaining clean, square apertures - Applying galvanised metal angle bead to all external corners of the media wall frame, including the top outside corners and the vertical edges of both recesses, to create straight, durable arrises - Applying galvanised stop bead around the perimeter of both openings where the plasterboard met the existing painted wall surfaces - Securing all boards with drywall screws at the correct centres to ensure a firm substrate - Applying a bonding PVA wash across all boarded surfaces and bead joints before skimming - Finishing the entire media wall structure with two coats of British Gypsum multi-finish plaster — a scratch coat trowelled on and ruled flat, followed by a tight finishing coat to produce a flat, paintable surface - Feathering the skim coat neatly into the existing surrounding wall plaster at all edges
View Case StudyFull House Re-skim in Tower Hamlets, E1
Tower Hamlets, London
The full scope of work on this project involved re-skimming the entire ceiling of the main living room in this period property in South London. Rather than overboarding, the decision was made to skim directly over the existing Artex surface, which is a common and cost-effective approach where the Artex is still firmly bonded to the substrate and shows no sign of delamination or large-scale blowing. The work included: - Full assessment of the Artex ceiling to confirm it was stable and suitably bonded - Application of a PVA bonding solution across the entire Artex surface to seal and stabilise the porous, textured substrate - Once the PVA had become tacky, a bonding or finish plaster scratch coat was applied to begin filling the Artex texture - A second finishing coat of multi-finish plaster was then laid over the ceiling to bring it to a flat, smooth surface - The ceiling fan rose was carefully worked around and masked to protect the fitting - Green masking tape and plastic dust sheeting were used throughout to protect all walls, floors, and fixtures - Final trowelling and polishing of the skim coat to produce a flat, paint-ready surface The project was completed as part of a broader full house re-skim, with this ceiling forming one of the key rooms treated during the works.
View Case StudyFull House Re-skim After Rewire & Renovation in Kensington and Chelsea, W8
Kensington and Chelsea, London
The scope of work covered the full re-skim of multiple ground-floor rooms in this Victorian terrace following a complete rewire and plumbing renovation. In the front reception room, the ceiling required patching across multiple cut areas created by electricians chasing new cables, followed by a full skim coat across the entire ceiling plane to achieve a consistent surface. Walls in this room had been partially stripped and needed bonding coat applied to the bare brick sections before skimming could begin. Chased electrical channels throughout the walls were filled with bonding plaster and left to dry fully before any skim coat was applied over the top. In the rear room — identified as the kitchen space — walls had been stripped completely back to the original Victorian brickwork on two full elevations. Exposed brick required a scratch coat of bonding plaster to build up the surface level before the finish skim could be applied. The ceiling in this room also had multiple cut-outs left by the electrician for downlighter positions, consumer unit access, and cable runs, all of which required patching back with plasterboard offcuts fixed into position before the ceiling could receive its skim coat. Surface-mounted copper pipework and new electrical conduit runs were plastered around neatly. Both rooms were protected with dust sheets and the floors were covered throughout the works.
View Case StudyFull House Re-skim – Wall & Ceiling Re-skim in Hammersmith and Fulham
Hammersmith and Fulham, London
The scope of work covered a full re-skim of all walls and ceilings across two ground-floor rooms within this Victorian terraced property in South London. Both the front and rear rooms required a complete strip of the failing finish coat from the ceiling before any new plaster could be applied. The ceiling surfaces, while not fully replaced, needed to be thoroughly prepared to ensure sound adhesion of the new skim coat. All four walls in each room were identified as requiring a full re-skim over the existing backing plaster, with specific areas of blown and delaminating plaster marked for filling or cutting back prior to skimming. Electrical chases running vertically and horizontally across the walls needed to be filled with bonding compound and allowed to fully set before the walls were skimmed over. The works also included making good around the window reveal in the rear room, where chased conduit was visible at low level. PVA bonding agent was applied across the walls and ceiling to stabilise the porous, old plaster substrate and provide a regulated suction surface for the multi-finish. The project was executed room by room to allow adequate drying time between rooms and to minimise disruption to the ongoing refurbishment programme.
View Case StudyFull House Re-skim in Tower Hamlets, E1
Tower Hamlets, London
The full scope of work covered the complete re-plastering of the front reception room and, based on the project title, extended across multiple rooms throughout the property as part of a whole-house renovation. In the room photographed, the existing plaster was stripped back in the lower wall section to expose the bare brick, likely due to damp ingress or blown plaster at the base. The upper walls had received a bonding or browning coat as a base, and the full wall surfaces were then re-skimmed with two coats of Thistle Multi-finish plaster. The ceiling in the lower image appears to have been freshly skimmed as well, showing a smooth, wet skim coat applied across the full ceiling plane. Green protective sheeting was laid across the floor to protect the stripped floorboards and remaining furniture from plaster splatter. Door architraves and the door frame itself were masked off prior to plastering. Electrical sockets were removed from the wall beforehand, with back boxes left in place, and replated after plastering was complete. The exposed brick lower wall section required additional preparation before skimming could proceed, adding time to the schedule for that wall.
View Case StudyWall Skimming & Kitchen Replastering in Kensington and Chelsea, W8
Kensington and Chelsea, London
The scope of work covered the full re-plastering of all four kitchen walls and the treatment of the ceiling perimeter where mould had developed. The project included the following specific tasks: stripping remaining loose and blown old render from the walls; preparing the bare brick wall with a bonding agent prior to dot-and-dab plasterboarding; fixing new plasterboard to the brick wall using a dot-and-dab method with bonding compound applied in blobs at regular centres; cutting boards to fit around existing back-boxes, pipe runs, and cable drops; sealing the previously plastered walls with a diluted PVA wash to reduce suction before skimming; filling and flattening chased electrical channels where cabling had been surface-run; applying a bonding coat to any areas of high suction or mixed substrate; applying a two-coat multi-finish skim to all walls — scratch coat followed by a tight finishing coat; feathering skim edges neatly into door architraves and window reveals; treating the ceiling-to-wall junction where mould had been present with a mould-resistant primer before finishing. The floor was protected throughout using Taktec hard floor protection, and the doorway was sealed with a polythene dust sheet to contain dust within the working area.
View Case StudyFull House Re-skim in Harrow, HA1
Harrow, London
The scope of work covered a full house re-skim across the ground floor rooms, including the hallway and the reception rooms leading off it. Every wall surface was prepared and re-skimmed with two coats of British Gypsum multi-finish plaster. The ceiling areas that had been partially stripped were also addressed — where the existing finish had failed or been removed, the substrate was stabilised and re-skimmed to match surrounding surfaces. Skirting boards had been taken off prior to the team arriving, allowing the skim to run down cleanly to the floor line, ensuring a flush finish when new skirting was later refitted. The hallway walls, which included the area around the period glazed door frame, required careful cutting-in along the architrave edges and around the door casing. Internal electrical back-boxes — visible as recessed cut-outs in the wall — were worked around neatly during the skimming process. All rooms were skimmed in sequence to allow each area adequate drying time before the team moved to the next. The work was coordinated around the wider renovation programme to avoid conflict with other trades working on the property at the same time.
View Case StudyCeiling Overboarding & Re-Skim in Redbridge, IG1
Redbridge, London
The scope of work involved a full ceiling overboarding and skim coat across what appears to be a hallway or stairwell landing ceiling in a Victorian terraced property. The existing failed plaster was stripped back where necessary and the ceiling was prepared to receive new 12.5mm plasterboard sheets. The boards were fixed directly to the ceiling joists using drywall screws, with joints taped using scrim tape and covered with a copper-jointed finish visible in the mid-process photograph. The entire ceiling surface was then skim coated with two coats of multi-finish plaster — a scratch coat to build up an even base, followed by a finishing coat trowelled to a smooth, paint-ready surface. The walls in the space were also partially skimmed as part of the wider project, visible in the finished photograph where fresh plaster can be seen on the wall surfaces alongside the completed ceiling. Protective sheeting and masking tape were applied to all adjacent surfaces including window frames, door architraves, and skirting boards to protect them throughout the process.
View Case StudyBarbershop Wall Skimming & Re-skim in Brent, NW10
Brent, London
The full scope of work covered the main back wall of the barbershop, which ran the full width of the unit. The primary task was to fill and patch the four large rectangular voids left by the removed mirror fixings. Each void required bonding coat to be applied in stages to build the substrate back up to a level consistent with the surrounding wall surface. Once the bonding coats had been allowed to firm up sufficiently, the entire wall — both the patched sections and the surrounding painted plaster — was prepared and re-skimmed with a full coat of multi-finish plaster. The electrical socket back-boxes along the wall were also incorporated into the scope, with the chased cable routes filled and made flush before the skim coat was applied over them. The ceiling was already in good condition and did not form part of the scope. Floor protection was laid using a combination of dust sheets and a Taktec floor protection roll to safeguard the vinyl flooring throughout the works. The finished wall was brought to a smooth, paint-ready surface across its full length, ready for the client's decorator to apply the final colour.
View Case StudyFull House Re-skim in Richmond upon Thames
Richmond upon Thames, London
The scope covered a full re-skim of the main room walls, incorporating a mix of new bonding coat application to bare or damaged substrates and direct over-skim to stabilised painted surfaces. Specifically, the work included: - Stripping and preparing the chimney breast or feature wall section back to a clean, bondable substrate - Applying a bonding coat (Thistle Bonding Coat or equivalent browning) to the bare wall section and cross-scratching the surface with a devil float to create a mechanical key for the finish coat - Fixing a metal angle bead to the exposed corner edge of the bonded section to define a clean plumb line and protect the arris - Integrating exposed electrical back boxes and re-routed socket positions into the plaster level, ensuring sockets sat flush once the skim was applied - Applying a diluted PVA bonding agent to any old painted plaster surfaces to reduce suction and improve adhesion before skimming - Applying two coats of British Gypsum Multi-Finish plaster across all walls — a first coat laid on and spread firm, followed by a tightening finish coat worked to a smooth, flat surface - Feathering all new skim edges into the existing plaster at door frames, ceiling junction and floor level - Protecting the floor with dust sheets throughout the duration of the work
View Case StudyCeiling Overboarding & Re-Skim in Kingston upon Thames
Kingston upon Thames, London
The full scope of work on this project centred on replacing the failing ceiling surface through a complete overboarding operation across the room. The existing ceiling was assessed for structural stability, with all loose sections identified and any risk of further detachment noted before work began. New 12.5mm tapered-edge plasterboard sheets were measured, cut, and fixed directly to the existing ceiling joists using drywall screws at the correct centres, ensuring a flat and stable substrate across the entire ceiling plane. All board joints were aligned to fall on joist centres where possible to minimise movement and future cracking. The joints between boards were covered with pink scrim tape — clearly visible in the before photograph — which was bedded into the first coat of jointing compound or bonding plaster to prevent cracking through the finished skim. The ceiling rose drop was retained through the new boarding, with the electrical pendant carefully managed throughout. Once the boards were fixed, jointed, and the scrim tape fully embedded, the ceiling received a full two-coat skim using British Gypsum multi-finish plaster, brought to a smooth, flat surface ready for decoration. The finished ceiling, visible in the bottom-left photograph, shows a consistent, evenly trowelled surface under artificial light with no visible board lines or joint shadows.
View Case StudyFull House Re-skim After Rewire & Renovation in Newham, E6
Newham, London
The scope covered a full re-skim of all walls within the ground-floor room following completion of first-fix electrical and plumbing works. This included filling and making good all chased holes left by the electrician — there were at least eight to ten visible circular holes across the walls from new back box installations, each requiring individual packing and bonding before being brought flush with the surrounding plaster surface. The large hacked-back section adjacent to the doorway required a bonding coat application to re-establish a stable, even substrate before skimming. All remaining wall surfaces that still held their original plaster were assessed for adhesion and suction before receiving a PVA dilution wash to control porosity. Once all patched areas had fully cured and dried, the entire wall surface received a continuous two-coat skim using British Gypsum Thistle Multi-Finish plaster, applied wall by wall to maintain a consistent wet edge. Ceiling surfaces, which appeared to be previously skimmed plasterboard, were assessed for any disruption from the rewire and prepared accordingly. The boiler and consumer unit boxing on the far wall was plastered around cleanly, and all electrical cables were left protruding neatly through the finished skim for the second-fix electrician to terminate.
View Case StudyFull House Re-skim in Haringey, N8
Haringey, London
The scope of work covered a full house re-skim across all rooms in this Victorian terraced property in Haringey. This included both ground-floor reception rooms, the kitchen, a rear dining extension, three upstairs bedrooms, the landing and stairwell walls, and the bathroom walls where wet areas allowed. Every wall and ceiling surface in the property was assessed prior to starting, with areas of blown or unstable plaster identified and marked for additional preparation before skimming could begin. The total plastered area across the property was estimated at approximately 280 square metres. Where walls had previously been painted with oil-based paint, these required mechanical preparation to allow the new skim coat to bond correctly. Chased channels from a recent rewire were present in multiple rooms and required filling with bonding plaster and allowing adequate drying time before the skim coat was applied over the top. The project was planned and sequenced room by room to allow each area sufficient drying time before the client's decorators moved in behind us.
View Case StudyEML Structural Crack Repairs & Wall Patch Plastering in Waltham Forest, E17
Waltham Forest, London
The scope of work covered EML (Expanded Metal Lath) crack repairs and patch plastering across multiple walls in a Victorian terraced house in Waltham Forest. The key tasks included: — Cutting back all loose and delaminated plaster from around each crack to expose sound substrate — Fixing galvanised EML mesh over each crack line using stainless steel screws and washers to mechanically bridge the crack and prevent future re-opening — Applying a bonding coat over the EML mesh and surrounding exposed areas to build up a sound base — Patch skimming each repaired section with two coats of Thistle Multi-Finish plaster, feathering the edges to blend with surrounding walls — Treating the bathroom wall separately, cutting back water-damaged plaster, allowing to dry, and replastering with a bonding undercoat followed by a finish coat — Infilling areas around window reveals and door frames where plaster had broken away, reinstating the correct profile and depth — Addressing a section of exposed brick near a window sill that had lost its original render entirely, requiring a scratch coat before the finish skim The repair methodology across all rooms was consistent: mechanical fixing of EML, bonding build-up, and two-coat finish plastering to restore a flat, stable surface ready for decoration.
View Case StudyFull House Re-skim & Kitchen Replastering in Hounslow, TW3
Hounslow, London
The scope of work covered multiple rooms across the full property. In the kitchen, all four walls required a full bonding coat followed by a multi-finish skim coat, working around the wall-hung boiler, exposed pipework, and multiple cable drops left by the electrician. The chased channels were filled and allowed to set before the bonding coat was applied across the entire wall surface. In the hallway, the existing Artex swirl ceiling was overboarded with fresh plasterboard rather than attempting a direct skim over the textured surface, as the Artex profile was too deep for a standard skim to flatten effectively. In the main reception room, fresh plasterboard had been screw-fixed to ceiling battens, with the board joints taped using scrim tape and jointing compound before the skim coat was applied. All walls throughout the property that had been exposed during the rewire were re-skimmed after the chased electrical channels were filled with bonding plaster. The hallway walls, which still showed original painted plaster in reasonable condition, were prepared with a PVA dilution wash and re-skimmed directly over the existing surface. The scope totalled approximately 120 square metres of plastered surface across ceiling and wall areas.
View Case StudyCeiling Replacement & Wall Re-Skim in Ealing, West London
Ealing, London
The scope of work for this stairwell ceiling replacement and wall re-skim in Ealing covered the following: removal of all remaining lath and plaster debris from the ceiling void; inspection of the exposed timber joists for any signs of structural movement or rot; fixing new 12.5mm tapered-edge plasterboard sheets directly to the ceiling joists using drywall screws at the correct centres to achieve a flat, level substrate; jointing of all plasterboard seams using scrim tape and a bonding compound to prevent cracking at the board joints; application of a PVA bonding wash to the surrounding wall surfaces where old plaster had been cut back or had deteriorated; a full two-coat multi-finish skim applied to the new plasterboard ceiling, comprising a scratch coat to embed and key the surface followed by a finish coat trowelled flat; and a matching two-coat skim applied to the prepared wall surfaces to ensure the walls and ceiling met at a clean, consistent finish. Throughout the project, the stairwell access required the use of a tall telescopic ladder and platform arrangement to allow safe working at height across the full ceiling area.
View Case StudyFull House Re-skim & Hallway Replastering in Hillingdon, UB8
Hillingdon, London
The scope of work for this Hillingdon hallway and stairwell re-skim covered several distinct elements visible across the three project images. First, the old plaster was fully hacked off the hallway walls, exposing the bare Victorian brick substrate beneath. This required complete re-plastering from scratch rather than a simple re-skim. New plasterboard sections were fixed to the stairwell ceiling to replace the damaged or inadequate existing substrate, with joint tape applied at all board joints and screw fixings used throughout. The angled stairwell ceiling — which drops at an angle matching the staircase pitch — was replastered, requiring careful cutting and fitting around the raking soffit. The hallway walls, once stripped to bare brick, were prepared for a full two-coat plaster system. The window reveal in the hallway was also replastered, with new plaster applied around the uPVC window frame. Green floor protection sheets were laid across the floor and stair treads to protect the surfaces during plastering. The work included skimming all replastered surfaces to a smooth finish ready for decoration, covering the hallway entrance walls, the stairwell side walls, the raking ceiling beneath the stair, and the new flat ceiling boards overhead.
View Case StudyGarage Conversion Plasterboarding & Skim in Barnet EN5
Barnet, London
The full scope of work for this garage conversion plastering project in Barnet covered complete dry lining of all four walls and the ceiling using a timber stud and metal track framing system, followed by fixing of 12.5mm plasterboard throughout, and finally a two-coat multi-finish skim applied to all boarded surfaces. Specifically, the work included: erecting a perimeter timber and metal stud framework fixed to the brick walls at a consistent depth to create flat, true surfaces ready for boarding; fixing 12.5mm tapered-edge plasterboard sheets to the timber ceiling joists and stud walls using drywall screws at 300mm centres; taping and jointing all board joints and internal angles with scrim tape and bonding compound; applying a PVA bonding wash to all plasterboard surfaces prior to skimming; applying a scratch coat of Thistle Multi-Finish plaster across all walls and the ceiling; and finishing with a tight trowelled second coat to bring all surfaces to a smooth, paint-ready standard. Electrical back boxes were cut in and plaster was carefully worked around the first-fix cabling drops. The skirting boards were also fitted prior to the final skim coat, with the plaster taken down neatly to the top edge of each board.
View Case StudyFull House Re-skim & Media Wall Plastering in Lewisham, SE13
Lewisham, London
The scope of work covered two primary elements: a full re-skim of the living room walls and the construction and skim of a bespoke media wall unit. For the media wall, a timber and metal stud frame was erected against the chimney breast wall and faced with moisture-resistant plasterboard. The media wall was designed with two open recessed niches — one above the other — to house a TV bracket and AV equipment respectively. Cabling and conduit were routed through the frame prior to boarding, with socket backboxes positioned and secured. The frame was then boarded using 12.5mm standard plasterboard, taped at all joints, and finished with metal corner bead on all external angles to produce sharp, defined edges. The surrounding living room walls, including areas adjacent to the built-in shelving unit and the chimney breast flanks, were prepared and re-skimmed throughout. Floor protection sheeting (Atakte hard floor protector, visible in green in the photos) was laid across the full floor area before work commenced. The finished media wall was skimmed with two coats of Thistle Multi-Finish plaster — a scratch coat followed by a trowelled finishing coat — to achieve a flat, paintable surface across all faces of the unit.
View Case StudyLoft Bathroom Wall Skimming & Re-Skim in Havering, RM1
Havering, London
The full scope of work covered skimming all plasterboard walls within the loft conversion bathroom from floor to ceiling, including the vertical sections beneath and beside the Velux roof windows and the angled reveals formed by the sloping roofline. The flat ceiling section over the doorway had already been finished, so the work focused exclusively on the wall surfaces. This included the main shower wall where the quadrant shower tray sat against the corner, the opposing wall with the plumbing stub-outs, and both side walls running the length of the room. The doorway opening required careful finishing around the existing timber frame to ensure a clean, straight edge at the transition between skimmed plaster and the door lining. Exposed insulation at the junction between the sloped ceiling and the vertical walls was pushed back and the board edges were reinforced with angle bead before skimming. All protruding pipe and conduit stubs were worked around neatly so the plumber and electrician could continue their second-fix installation immediately after the plaster had dried.
View Case StudyWall Crack Repair & Re-Skim in Merton SW20
Merton, London
The scope of work for this project centred on properly repairing a full-height vertical crack in the main wall of a utility room within a Victorian terraced house in Merton. Rather than simply filling the crack with filler and repainting — which would have failed again within months — the decision was made to open up the crack, stabilise the substrate, apply a bonding coat, and re-skim the affected section of wall from ceiling to floor. This ensured the repair blended seamlessly into the existing wall surface and would not re-emerge under new paint. The work included raking out the crack fully to sound edges, applying a PVA bonding agent to the exposed background, bringing the area up to level with a bonding coat of Thistle Hardwall, allowing adequate drying time, and finishing with a full-length skim coat of British Gypsum Multi-Finish. The existing skirting board and coving were protected throughout. Floor protection was laid down using the green protective sheeting visible in the before image. The repair zone covered a strip roughly 400–500mm wide and the full room height — as visible in the after photograph showing the brown bonding coat applied in a vertical band up the wall.
View Case StudyFull House Re-Skim in Greenwich, SE10
Greenwich, London
The scope of work covered a full house re-skim across multiple rooms in this Greenwich Victorian terrace, with the kitchen being one of the final rooms captured in progress. The work included: - Re-skimming all walls throughout the property with a two-coat application of British Gypsum Multi-Finish plaster - Skimming the kitchen walls above and around the newly fitted kitchen units, working carefully to the edges of the cabinets and around electrical back boxes - Addressing the ceiling in at least one room, visible in the inset photo, which shows a plasterboard ceiling with an access hatch and a small hole from a previous fitting — both required patching and finishing flush before skimming - Preparing and priming all surfaces prior to skim application, including PVA bonding of porous old painted plaster to prevent suction issues - Filling and finishing around ceiling penetrations and recessed light positions - Protecting the newly installed kitchen — units, worktops, appliances and flooring — with dust sheets and polythene throughout the works The kitchen re-skim alone covered a substantial wall run, with the fresh brown multi-finish coat visible across the full height of the wall from worktop level to ceiling junction, indicating a complete re-skim rather than a patch repair.
View Case StudyFull House Re-skim & Media Wall Plastering in Wandsworth, SW18
Wandsworth, London
The scope of work across this property covered the full re-skim of all rooms, with the living room requiring the most considered approach due to the bespoke media wall construction. The main chimney breast wall had been framed out in plasterboard to form a flat surface housing both the inset electric fireplace aperture and the flush TV recess. This framework required careful skim plastering around the precise cut-outs to ensure clean, sharp edges at both the television recess and the fireplace opening. The flanking alcove walls, previously dry-lined with new plasterboard, were PVA bonded and skimmed in two coats of multi-finish plaster to achieve a flat, even surface. The ceiling across the living room was also skimmed from fresh plasterboard. Throughout the remaining rooms — including bedrooms, hallway and landing — existing plaster walls were assessed, with blown or unstable sections cut back and re-bonded before the full re-skim was applied. All surfaces were prepared to accept emulsion paint directly, with no further lining paper required. The total project brought every wall and ceiling in the house to a uniform, smooth standard consistent with the quality expected in a full renovation.
View Case StudyFull House Re-skim & Ceiling Replacement in Lambeth, South London
Sutton, London
The scope of work across this property was substantial and covered ceiling replacement, wall re-skimming, and full protective sheeting of all fixtures and fittings prior to plastering. In the main reception room, the damaged ceiling was stripped back and new plasterboard was fixed to the existing timber joists using drywall screws at regular centres, with the board joints taped and jointed before skimming. Timber battens were used at the ceiling perimeter and at intermediate points to provide a solid fixing line across the full span of the ceiling. A total of six to eight full sheets of 12.5mm plasterboard were used across the ceiling area, with boards cut to fit around the cornice line and window reveals. All walls throughout the property were prepared and re-skimmed with Thistle Multi-Finish plaster, applied in two coats — a scratch coat and a finishing coat — to achieve a flat, even surface ready for paint. The kitchen area, including the central island unit and all worktops, was fully wrapped in heavy-duty Proplex protective sheeting and polythene dust sheets to prevent contamination. Walls adjacent to cornicing were carefully masked with green tape to protect the existing decorative plasterwork. Electrical cables were left safely protruding through the new ceiling boards, ready for the electrician to reconnect the downlighters once plastering was complete.
View Case StudyFull House Re-skim in Barking and Dagenham RM8
Barking and Dagenham, London
The scope of work covered a full house re-skim across multiple rooms on at least the ground floor of this Victorian terraced property in Barking and Dagenham. The visible rooms included a hallway, a front or rear reception room, and what appears to be a connecting space — all receiving fresh skim coats to walls. Key tasks included: - Hacking off or preparing existing old plaster surfaces where blown or flaking - Filling chased electrical channels following first-fix electrical work - Applying a PVA bonding wash to stabilise porous or patchy wall substrates prior to skimming - Applying a scratch coat of multi-finish across all prepared wall surfaces - Trowelling up to a smooth finishing coat on all walls - Working around door frames, window reveals, and plasterboard ceiling junctions - Squaring up corners and reveals in the hallway and between rooms - Managing the drying sequence across multiple rooms to avoid overworking wet plaster The project was carried out on a Saturday, with a team working across multiple spaces simultaneously to meet a tight turnaround. Ceiling work in at least one room involved a plasterboard-lined ceiling visible through the doorway, suggesting overboarding or new plasterboard was installed as part of the broader renovation package.
View Case StudyFull House Re-skim in Barking and Dagenham RM8
Barking and Dagenham, London
The scope of work at this Barking and Dagenham terraced house covered the front bay window reception room as the primary focus, with additional plastering work carried out throughout the rest of the property as part of the full house re-skim. In the main reception room, the ceiling was overboarded with 12.5mm plasterboard sheets fixed to the existing ceiling joists above. The boards were cut to fit neatly around the bay window geometry, with joints taped and jointed before skimming. The angled soffits above the bay window were also boarded and skimmed to provide a flat, consistent surface across the entire ceiling plane. The walls in the reception room were re-skimmed, with the plaster applied in two stages — a scratch coat to build up any low spots, followed by a finishing coat of multi-finish plaster. The bay window return walls were also skimmed to match. Throughout the rest of the house, walls and ceilings received a full re-skim using Thistle multi-finish plaster, with surfaces prepared using a diluted PVA bonding solution prior to application to ensure proper adhesion across the porous, aged substrate.
View Case StudyFull House Re-skim & Plasterboard Wall Lining in Lambeth, London
Merton, London
The scope of work for this full house renovation plastering package included the following across multiple rooms: 1. Timber stud wall frames were constructed to the front window wall to create a clean, insulated surface away from the original masonry. Green moisture-resistant plasterboard (12.5mm) was fixed to the studs, particularly around the window reveal and bay area. 2. Where existing walls were intact but in poor condition — rough, uneven, or previously tiled — a bonding coat was applied to provide a stable base before the finish skim. 3. All ceilings received a two-coat multi-finish skim. The before photos show bare plasterboard ceilings with no skim applied; the after photos show freshly skimmed ceilings with a consistent, flat surface ready for decoration. 4. Window reveals were boarded and skimmed to match the surrounding walls, creating a clean return around each frame. 5. Electrical back boxes and socket positions were accommodated during the skim process, with the plasterer working around the first-fix electrical layout. 6. Each wall received a bonding or browning undercoat where required, followed by a two-coat Thistle Multi-Finish skim — a scratch coat worked into the surface and a finishing coat trowelled flat and polished back.
View Case StudyFull House Re-skim & Stairwell Plasterboarding in Havering
Havering, London
The full scope of work at this Havering property included the removal of old plaster in the stairwell area where necessary, followed by the installation of new 12.5mm plasterboard fixed directly to the existing timber studs and ceiling joists. The raking stairwell ceiling required boards to be cut and fitted at precise angles to follow the pitch of the stairs, with all joints taped and jointed before skimming. Once the plasterboard installation was complete, the entire stairwell ceiling and walls received a full two-coat skim using British Gypsum multi-finish plaster. The scratch coat was applied first and allowed to firm up, after which the finishing coat was applied and trowelled to a flat, even surface. In addition to the stairwell, the wider re-skim programme across the property covered multiple rooms, with walls and ceilings prepared and skimmed to a consistent standard throughout. All electrical drop points and light fittings were carefully worked around and left flush with the new plaster surface. The project was completed as part of a full house renovation programme, bringing all plastered surfaces back to a paintable standard.
View Case StudyHallway Ceiling Replacement & Wall Re-skim in Haringey
Haringey, London
The scope of work on this hallway ceiling replacement and re-skim project in Haringey covered the full process from bare joists through to a freshly skimmed, paint-ready finish. Our team carried out the following works: First, all exposed timber joists were inspected for level. Where individual joists had dipped or bowed, noggings were introduced to provide a flat plane for the new plasterboard. All existing electrical cables were confirmed clear of the fixing zones before boarding commenced. New 12.5mm tapered-edge plasterboard was measured, cut and fixed across the full hallway ceiling, screw-fixed at 150mm centres into every joist. All board joints were staggered to prevent straight-line cracking and the perimeter boards were set back slightly from the cornice to allow for the skim coat to terminate cleanly. The wall sections that had been hacked back during the rewire were assessed individually. Chased cable runs were filled with bonding coat and allowed to set firm before the walls were PVA-washed to seal the porous brick and old plaster interface. The original Victorian cornice was retained, cleaned and masked during the plastering process to preserve the period character of the property. The full ceiling and all repaired wall sections then received a two-coat multi-finish skim to bring the entire hallway to a uniform, flat surface ready for decoration.
View Case StudyFull House Re-skim in Waltham Forest, E17
Waltham Forest, London
The full scope of work covered the re-skimming of ceilings and walls across multiple rooms in the property, including bedrooms, living areas, and connecting spaces. Each ceiling was assessed individually before skimming commenced. The bedroom ceiling visible in the photograph received a full fresh skim coat applied directly over the existing plasterboard substrate after preparation. Walls in all rooms were similarly treated — existing painted surfaces were assessed for suction, and a diluted PVA bonding solution was applied where the old paint layers had reduced the surface porosity to a level that would prevent a new skim coat from bonding reliably. The full scope included: assessment and preparation of all ceiling and wall substrates, PVA bonding wash applied to low-suction surfaces, two-coat multi-finish skim applied to all ceilings, two-coat multi-finish skim applied to all walls, careful trowelling back to a tight, flat finish ready for mist coat and decoration, and protection of floors and radiators using dust sheets and masking film throughout. Blue protective sheeting and masking tape are clearly visible in the photograph, covering the radiator and lower wall areas during the active plastering stage.
View Case StudyCeiling Replacement & Wall Re-Skim in Redbridge IG1
Redbridge, London
The scope of work covered the full replacement of the reception room ceiling, from bare joists through to a finished skim-coated surface ready for decoration. This included: supplying and fixing 12.5mm tapered-edge plasterboard sheets directly to the exposed timber joists using drywall screws at the correct centres; taping all board joints with paper jointing tape and applying a jointing compound to fill the recessed edges flush; applying fibreglass scrim tape to all board joints prior to skimming to prevent cracking along board lines; applying a two-coat multi-finish skim across the entire ceiling — a scratch coat to key the surface, followed by a tight finishing coat worked to a flat, paint-ready surface; and making good the junction between the new plasterboard ceiling and the existing coving around the room perimeter. The walls had been previously re-skimmed as part of the same project, and the finished images show the full room with both ceiling and walls brought to a consistent, smooth, pale finish ready for the decorator.
View Case StudyFull House Re-skim Service in Newham, East London (E6)
Newham, London
The scope of work covered a full house re-skim across multiple rooms of this Victorian terraced house in Newham E6. The hallway and staircase area — visible in the photos — was a central part of the project, with walls stripped back to brick before new plaster was applied. The ceiling in the hallway was re-skimmed and the period coving was carefully retained and cleaned. The inset image confirms that the walls adjacent to the staircase were fully hacked back to expose the brick, indicating blown or structurally compromised backing plaster that could not be overboarded. Rooms throughout the property received a full re-skim, starting from the hallway and progressing room by room. All electric switch plates and socket outlets were temporarily removed to allow a clean skim edge around each fitting. Door frames and architraves were masked or protected during the plastering process. Dust sheets were laid on all floor surfaces. Given the Victorian construction, the walls varied between solid brick and timber lath — both substrates requiring different bonding approaches before multi-finish was applied. The staircase spindles, newel post and handrail were all sheeted to prevent plaster contamination.
View Case StudyWall Skimming & Ceiling Replacement in Tower Hamlets E1
Tower Hamlets, London
The scope of work covered two adjoining ground-floor rooms and included both ceiling and wall plastering across the full renovation. In the main living room, the damaged ceiling required a full skim coat to address water staining and surface cracking. All four walls required re-skimming over the existing stripped substrate, which had been left in varying conditions following wallpaper removal and electrical rewire works. Exposed cable chases were filled and allowed to set before any skim was applied. In the second reception room, a brand-new plasterboard ceiling had been installed by the first fix team, with boards screwed to timber joists and all board joints taped with paper jointing tape. This ceiling required a full bonding and skim coat. The walls in this room also required re-skimming from floor to ceiling, with bonding coat applied to the porous and patchy masonry sections, particularly where old plaster had been hacked away around the electrical first fix. The window reveal and returns were re-skimmed, and the area around the French door frame was finished flush. Throughout both rooms, plasterers worked around live cables and rewiring, taking care not to disturb electrical first-fix positions while achieving flat, plumb wall surfaces ready for the second-fix electrician and decorator.
View Case StudyFull House Re-skim & Hallway Renovation in Kensington and Chelsea
Kensington and Chelsea, London
The full scope covered replastering of all stripped walls throughout the Victorian terraced house, with particular focus on the entrance hallway, stairwell, and ground-floor reception areas. Specific tasks included: applying a stabilising PVA bonding solution to all bare brick and rubble stone surfaces across the hallway and stairwell; mixing and applying a scratch coat of Thistle BonditingCoat to the highly porous and uneven brick substrate to bring the walls to a consistent level; following the bonding coat with a two-coat finish skim using British Gypsum Thistle Multi-Finish plaster; working around the original Victorian coving and cornice profiles, carefully cutting in plaster at the coving line to preserve the decorative mouldings; plastering the stairwell walls from ground floor through to first floor using a Werner extension ladder for access on the staircase; filling and making good around the ceiling access hatch opening in the upper hallway; and applying multi-finish skim coats to the stairwell soffit and adjacent walls. Protection sheeting (visible as green Naltec sheeting and white dust sheets) was laid across all floor areas before work commenced. Total wall area replastered across all spaces is estimated at approximately 90–110 square metres.
View Case StudyCeiling Overboarding & Full Wall Re-Skim in Hammersmith and Fulham
Hammersmith and Fulham, London
The scope of work for this project covered two primary elements: the newly installed ceiling plasterboard required a full skim coat to produce a flat, paint-ready surface, and the stripped walls throughout the room required a full bonding and skim treatment to bring them back to a sound, smooth finish. For the ceiling, the new 12.5mm plasterboard panels had been fixed to the joists in a standard grid layout. All board joints and screw fixings required filling and taping before a two-coat skim could be applied across the entire ceiling plane. For the walls, the exposed brick and block substrate meant a bonding coat was required across all wall faces before any finish skim could be applied. Pockets of remaining old plaster also needed to be assessed — any hollow or poorly adhered sections would need to be removed before bonding proceeded. Additionally, the area around the two window reveals required particular care, as the junction between the new plasterwork and existing window frames needed to be neatly formed and finished. The recessed downlighter positions in the ceiling were also worked around to ensure clean, circular cuts were maintained through the skim coat. The team also managed the preparation of the PVA bonding wash across the porous brick surfaces, mixing and applying bonding plaster, and ultimately finishing all surfaces with a two-coat multi-finish skim to achieve a flat, smooth surface throughout.
View Case StudyFull House Re-skim & Property Renovation in Harrow
Harrow, London
The scope covered the full re-skim of all walls and ceilings throughout multiple rooms of the Victorian terrace. Key elements included: skimming all newly erected timber stud partition walls that had been fitted with galvanised wire mesh backing — visible clearly in images two and three — to accept a bonding coat prior to finishing. The exposed brick chimney breast and fireplace wall required a full scratch coat of bonding plaster before any finish skim could be applied. Partially demolished ceilings in the reception room required the exposed joist sections to be boarded with new plasterboard before being brought level with the remaining existing ceiling surface and skimmed. The hallway walls (image one) show the re-skim already completed to walls, with the ceiling also freshly skimmed and awaiting the loft hatch frame to be reinstated. Throughout the corridor, door linings had been replaced with new timber, and the reveals around each opening were skimmed as part of the works. Image four shows the main reception room mid-skim, with all four walls having received a full coat of multi-finish plaster over bonding, while bags of British Gypsum multi-finish and Refina finishing buckets are visible on the dust-sheeted floor, confirming materials in active use.
View Case StudyFull House Re-skim & Ceiling Replacement in Richmond upon Thames
Richmond upon Thames, London
The full scope of work across this property covered two distinct but interconnected phases. The first phase focused on the kitchen ceiling, which had failed structurally. The old lath and plaster ceiling was stripped entirely, exposing the original joists. A new secondary timber framework was constructed between the joists to provide a flat, level fixing surface, and 12.5mm tapered-edge plasterboard sheets were then fixed across this framework using drywall screws at appropriate centres. All board joints were taped with scrim tape before skimming. The second phase covered the walls throughout the property. In the bathroom or rear utility area, tiles had been removed and electrical first-fix work completed, leaving the wall surface as exposed brick and damaged plaster. These walls required a full bonding coat applied to the bare masonry substrate before any finish skim could proceed. Across the wider property, existing plaster surfaces that were sound were prepared with a PVA wash to seal porous areas, before receiving a full re-skim in multi-finish plaster. Electrical back boxes, chased channels, and switch drops were all made flush and allowed to cure before finish coats were applied. The result was a complete, consistent plaster surface across all rooms ready for decoration.
View Case StudyFull House Re-skim & Ceiling Replacement in Kingston upon Thames
Kingston upon Thames, London
The scope of work across this period property was extensive and covered multiple rooms and surfaces. The primary tasks included: full removal of the failed lath-and-plaster wall system in the main reception room, which had been stripped back to bare timber studwork; supply and fix of new 12.5mm plasterboard sheets across all exposed stud bays to create a flat, sound substrate for skimming; full ceiling replacement in the hallway and reception areas using new plasterboard fixed to the existing joists, with boards butted tightly against the retained hardwood cornice mouldings; two-coat skim application across all newly boarded ceilings using British Gypsum multi-finish plaster — a scratch coat followed by a tightened finishing coat; re-skim of all remaining walls throughout the ground floor hallway and connecting rooms where the existing plaster substrate was sound enough to bond to; dust sheeting and full floor protection laid across all working areas, including the original hardwood staircase and balustrade; and making good around all existing light drops, electrical back boxes, and ceiling pendants exposed during the replastering works. The project was carried out room by room to allow earlier sections to dry while work progressed through the property.
View Case StudyFull House Re-skim & Ceiling Replacement in Hounslow
Hounslow, London
The scope of work covered two primary areas of the property: the ground floor reception room and the hallway ceiling. In the reception room, all walls were to be prepared and re-skimmed with two coats of multi-finish plaster. The ceiling in this room had already been overboarded with new 12.5mm plasterboard prior to our visit, and was awaiting a skim coat. The hallway presented a larger structural task — the full lath-and-plaster ceiling had been stripped back to bare joists and needed complete plasterboard installation before any skim work could begin. New 12.5mm boards were to be measured, cut and fixed directly to the existing timber joists, with all board joints and screw fixings taped or filled before skimming. Throughout both areas, all electrical cable drops and ceiling rose positions were to be accommodated. The walls in the hallway and adjoining rooms were stripped to reveal a rough bonding coat with numerous hollows and surface irregularities, requiring a scratch coat of bonding plaster before the finish skim could be applied. The mahogany-stained beam divider between the front and rear reception rooms was preserved and protected throughout the works.
View Case StudyHallway Wall Skimming & Ceiling Re-Skim in Enfield
Enfield, London
The scope of work for this hallway included a full wall skim of all accessible wall surfaces, re-skimming of the ceiling, and repair and infilling of the stripped brickwork section visible on the staircase return wall. The ceiling required a full re-skim rather than patching, as the existing painted surface was too inconsistent to accept a partial skim without visible join lines. The wall sections that retained old plaster were checked for hollow areas by tapping — any sections that had blown were cut back to a sound substrate before being made good. The exposed brickwork on the staircase wall needed a bonding coat applied in advance to build up the surface level before the finishing skim could be applied. Door architraves and skirting boards were masked and protected prior to any plastering work beginning. The ceiling pendant light fitting was noted and the area immediately around the rose was carefully cut in by hand. All corners — including the external angle between the hallway ceiling and the staircase ceiling — were formed using corner beads to produce sharp, defined edges that would hold up to regular contact in a busy passageway.
View Case StudyWall Skimming & Re-Skim in Croydon CR0
Croydon, London
The scope of work for this Croydon living room centred on a full wall skim to bring all surfaces to a flat, paint-ready finish. The main left-hand wall had been bonded in an earlier phase, and this required a finishing skim coat of Thistle Multi-Finish plaster to bring it level with the surrounding surfaces. The archway reveal and adjacent wall sections were addressed separately, with particular care taken around the electrical back-boxes and conduit runs to ensure flush integration before skimming. The remaining three walls in the room were assessed for adhesion and surface integrity. Where painted plaster was found to be poorly bonded or crazed, the loose material was raked back and the substrate was treated with a diluted PVA bonding agent prior to skimming. The plasterer mixed fresh Thistle Multi-Finish plaster in the bucket visible in the image and worked across each wall in sequence, applying a scratch coat first to build up any low spots, followed by a trowelled finishing coat. The archway opening was also skimmed to match the surrounding flat walls. Throughout the process, socket and switch positions were kept clear and the surrounding areas were protected with dust sheets laid across the concrete screed floor.
View Case StudyFull House Re-skim in Camden NW1
Camden, London
The scope of work covered a full re-skim throughout the ground floor of this Victorian terraced property in Camden. This included the hallway, the front reception room, and the stairwell. Works involved: - Stripping back loose and failing plaster from all wall surfaces - Fixing new sections of 9.5mm plasterboard to lower wall sections where the substrate had been removed or chased during first-fix electrical work - Applying bonding coat across bare masonry and uneven areas before skimming - Applying a PVA wash to stabilise porous patches before the skim coat - Applying two coats of British Gypsum multi-finish plaster to all walls — a scratch coat followed by a finishing coat — trowelled flat and polished to a smooth surface - Re-skimming the ceiling throughout the hallway and reception areas - Feathering new plasterboard joints into existing surfaces to eliminate visible step lines - Allowing all surfaces to dry and lighten fully before the client's decorators followed on The finished scope left every wall and ceiling throughout the ground floor ready for mist coat and full redecoration, with no visible joints, patches, or surface irregularities remaining.
View Case StudyKitchen Extension Ceiling Replacement & Wall Skimming in Brent NW10
Brent, London
The scope of work covered the full replacement of the kitchen extension ceiling, including boarding the angled ceiling sections that frame the central glass lantern roof. New 12.5mm tapered-edge plasterboard was fixed directly to the exposed timber joists across the flat and angled ceiling planes. The boards were cut to accommodate the glass lantern frame and ceiling fan mounting box, ensuring clean edges around the existing structural frame. Once boarding was complete, all board joints received jointing tape and were filled flush before the skim coat was applied. The surrounding walls — visible in images one and two showing the dark-painted finish — also received a fresh skim coat to bring them in line with the newly boarded ceiling. Kitchen units, appliances, and the sink were all protected with heavy-duty polythene sheeting secured with masking tape. The fan unit was carefully isolated and worked around, with the mounting area boarded up to the existing bracket without disturbing the electrical connection. The overall scope was completed in a logical sequence: strip inspection, boarding, jointing, drying, then skim — ensuring no stages overlapped and moisture levels were checked before each coat.
View Case StudyFull House Wall Re-Skim – Croydon
Croydon, London
The scope of work covered a full wall re-skim across multiple rooms within this Victorian terraced property in Lambeth. The existing textured wall surfaces — a coarse, pitted coating that had been applied over the original plaster — were either mechanically removed or prepared as a substrate for re-skimming, depending on the condition of the underlying plaster in each room. Where sections had already delaminated and peeled, the loose material was cut back to a firm edge before any skimming began. Electrical recesses left by removed spotlight fittings were made good with bonding plaster and allowed to set prior to the main skim coat being applied. The ceilings were also addressed as part of the wider re-skim programme — the second image clearly shows a freshly skimmed ceiling, still wet, surrounded by white-painted plaster coving typical of a period property. Walls were skimmed with two coats of multi-finish plaster — a scratch coat to build out the surface and fill texture, followed by a tightened finishing coat worked to a flat, even plane. Dust sheets were used throughout to protect flooring and adjacent surfaces, with green masking tape applied to door frames and window boards to protect the timber.
View Case StudyFull House Re-Skim & Plasterboarding – Enfield
Enfield, London
The scope covered the full plasterboarding and skim coating of at least two rooms within this Victorian terraced property. The work included: fixing plasterboard sheets directly to all bare brick and concrete block walls across both rooms; plasterboarding the ceilings where the old lath and plaster had been stripped; taping all plasterboard joints with scrim tape before applying a bonding or base coat where required; applying a full two-coat skim of multi-finish plaster to all walls and ceilings throughout; ensuring all electrical back boxes were set flush and accommodated within the board thickness prior to skimming; protecting all existing floorboards with dust sheets throughout the works; and preparing all surfaces to a paint-ready standard. Images three and four clearly show the completed plasterboarding stage across walls and ceiling of one bedroom, with all boards fixed, joints taped with orange scrim tape, and the room fully sheeted on the floor in advance of the skim coat. Bags of British Gypsum Multi-Finish plaster are visible on site alongside a plastering hawk, mixing bucket and gauging tools, confirming the materials staged ready for the finishing phase.
View Case StudyKitchen Extension Ceiling Plasterboard & Skim – Lambeth SW8
Lambeth, London
The scope of work covered the full plastering of the vaulted kitchen extension ceiling, including all sloped ceiling planes, the flat sections between the Velux rooflights, and the internal angles where the ceiling met the walls. The plasterboard had been fixed to the timber roof structure prior to our arrival, so the work began with taping and jointing the board seams and applying scrim tape to all internal angles. Both Velux rooflight reveals required skimming to match the surrounding ceiling. The upper wall sections at the junction between the original rear wall and the new extension structure also required a bonding coat and skim to bring them level and flush with the existing plaster. Protective dust sheets were laid across the kitchen worktops and appliances — including the washing machine and dishwasher — before any work commenced. The total ceiling area across the vaulted planes was substantial given the pitched nature of the roof, requiring careful staging and working at height throughout.
View Case StudyFull House Re-Skim & Media Wall Plastering – Lambeth, SW8
Lambeth, London
The scope of work on this room covered the full skim of all newly plasterboarded walls, including the bespoke media wall with its three recessed niches. Each section of plasterboard had been fixed and taped in preparation, and our team was responsible for applying a two-coat multi-finish skim across every surface. The media wall presented additional complexity due to the internal reveals of each niche, which required individual skim application inside the recesses as well as on the surrounding face of the wall. The two recessed shelf units on either side of the central TV opening, and the wide horizontal low-level recess below, all needed to be skimmed internally to produce clean, paint-ready reveals. Ceiling work had been completed separately during an earlier phase. The overall room required careful sequencing to avoid overworking wet plaster in one area while finishing adjacent sections — a common challenge when two plasterers work simultaneously across a large wall.
View Case StudyFull House Re-Skim – Southwark, South London
Southwark, London
The full scope covered re-boarding and re-skimming of ceilings and walls across multiple rooms in the property. In the room shown, new 12.5mm plasterboard sheets were fixed directly to the ceiling joists using drywall screws, with each board positioned to stagger the joints and reduce the risk of cracking at the seams. The wall surfaces had new plasterboard installed, either dot-and-dab or direct fix depending on the substrate. All board joints — both on the ceiling and the walls — were taped using jointing tape and filled with a base coat of Thistle board finish or bonding compound to create a flat, continuous surface before the skim coat was applied. The yellow scrim tape visible running across every joint on the ceiling in the image confirms this stage was completed thoroughly before any finish plaster was applied. Back boxes and electrical outlets were left proud and protected. The scope extended across the full house, covering living room, hallway, and additional rooms throughout the property.
View Case StudyFull House Re-Skim – Southwark, South London
Southwark, London
The scope of work covered a full house re-skim, with this image capturing the entrance hallway as part of the wider project. Specific work included: re-skimming all walls throughout the hallway from floor to ceiling using British Gypsum multi-finish plaster; skimming the newly installed door reveal and window reveal to the side of the composite front door; re-skimming the hallway ceiling around the existing recessed downlights, working carefully around the fittings to maintain flush, level surfaces; applying two coats of multi-finish — a scratch coat to build depth and a finishing coat to bring the surface to a smooth, paint-ready finish; and treating all bare plasterboard surfaces with a diluted PVA solution prior to skimming to reduce suction and prevent the skim coat from drying too rapidly. The wider project extended this same re-skim process to all rooms throughout the property, including bedrooms, reception rooms and landings, making it a comprehensive full house re-skim rather than isolated room work.
View Case StudyFull House Re-Skim – Hackney, East London
Hackney, London
The scope across this property covered a full re-skim of ceilings and walls throughout the house. In one area — visible in image one — new plasterboard sheets had been fixed directly to the wall framing or existing brick substrate. The boards were screwed at regular intervals, with jointing tape applied along every board joint in preparation for skim. This wall section appeared to be within a rear extension or stairwell area, given the skylight visible overhead and the angular framing. The surrounding walls in this space showed bare, heavily degraded plaster that had been partly hacked off. In the front reception room, the ceiling skim was already applied and drying back, with walls still at the stripped and prepared stage awaiting their own skim coats. The fireplace surround had been protected and masked. Across the full house, the work included: stripping failed existing plaster where required, fixing new plasterboard to wall surfaces where the substrate was uneven or beyond repair, applying jointing tape to all board joints, priming porous surfaces with a diluted PVA bonding solution, and applying two coats of Thistle Multi-Finish plaster to achieve a flat, paint-ready surface.
View Case StudyFull House Re-Skim – Hallway & Stairwell Re-Skim in Bromley
Bromley, London
The scope of work covered the full re-plaster of the hallway and stairwell walls from ground floor to upper landing. This included: - Applying a bonding coat across all stripped bare-brick wall surfaces in the hallway and stairwell to build up a stable key for the finish skim - Installing plastic angle beads to all exposed external corners, including the stairwell angle and door reveal edges, to create straight, durable arrises - Allowing the bonding coat to firm up fully before applying two coats of multi-finish — a tight scratch coat followed by a trowelled finish coat — across all walls - Skimming the ceiling area within the stairwell void where it met the upper hallway - Working around the existing staircase without removing it, requiring precise trowel work along the stringer and balustrade line - Tidying all transitions between the new skim and existing door architraves and skirting boards - Leaving all surfaces flat, scratch-free and ready for mist coat and decoration
View Case StudyFull House Re-Skim – Islington, North London
Islington, London
The full scope of work covered the re-skimming of the angled ceiling across all pitched planes, along with the walls of this upper-floor room. The ceiling consisted of multiple plasterboard sheets fixed to the sloped timber roof structure, covering what appears to be a mansard or steep-pitched roof profile with a skylight cut-in. Each board joint required jointing tape and a bonding or Thistle board finish coat applied in two passes before the final skim could commence. The walls, which met the angled ceiling at varying angles, were re-skimmed to blend with the newly plastered ceiling surface. The electrical pendant cable was left dropped through the wet plaster at ceiling centre and dressed neatly. The work also included skimming around the skylight frame, requiring careful cutting-in at the window reveal edges. Given the multi-angled surfaces, the plasterer worked in sections to maintain a wet edge and avoid visible joins in the finished skim coat. The total area plastered across ceiling and walls in this room was substantial, requiring methodical staging across at least two working days.
View Case StudyFull House Re-Skim & Ceiling Replacement – Ealing
Ealing, London
The scope of work covered the full re-skim of all wall surfaces throughout the property, combined with a full ceiling replacement in the hallway and adjacent areas where the original plaster had been completely stripped back to the joists. In the living room, the existing ceiling was retained and prepared for a skim coat, while the walls across the entire ground floor required re-skimming following the full wallpaper strip. The hallway ceiling required new 12.5mm plasterboard to be measured, cut, and fixed directly to the exposed timber joists, working around the newly installed electrical cables and conduits that ran between the joist bays. Wall surfaces throughout were assessed for suction levels before any plaster was applied — areas with particularly high suction from old bare plaster were treated with a diluted PVA bonding solution prior to skimming. The staircase area was also included in the ceiling boarding works, with boards cut to follow the rake of the staircase line. Cable drops were carefully marked and left accessible at the correct positions for the electrician to connect. The project was coordinated around the ongoing renovation programme, with plastering works sequenced after the rewire was sufficiently complete to allow boarding to proceed without obstruction.
View Case StudyFull House Re-Skim – Westminster SW1
Westminster, London
The scope of work covered a full re-skim of the ground floor reception room, including both the newly boarded ceiling and the existing walls. The ceiling had been re-boarded prior to our visit using 12.5mm plasterboard fixed directly to the joists, with all joints taped using fibreglass mesh tape before skimming. The walls, which retained their original plaster substrate, required a bonding preparation wash before the skim coats could be applied. Specific tasks included: preparation of the freshly boarded ceiling, including checking all screw fixings were countersunk flush and taping all board joints with jointing compound; applying a diluted PVA bonding coat to all existing plaster walls to reduce suction and improve adhesion of the new skim; applying a scratch coat of Thistle Multi-Finish across the ceiling, then trowelling back to a flat plane; applying a scratch coat and finishing coat to all walls, working one wall at a time to maintain a wet edge; ruling off and trowelling the ceiling and walls to a flat, smooth surface ready for decoration; and cleaning down all window reveals, door frames and the radiator recess area where plaster met existing surfaces.
View Case StudyCeiling Replacement & Re-Skim – Wandsworth SW18
Wandsworth, London
The full scope covered complete removal of the failed lath and plaster ceiling, followed by installation of new 12.5mm plasterboard fixed directly to the exposed timber joists, and a two-coat multi-finish skim to bring the ceiling to a flat, paint-ready surface. The work included the following stages: full strip of all existing lath and plaster to expose the joist structure; inspection and clearance of the ceiling void to allow safe access for the electrician to re-route and secure all exposed cabling; cutting and fixing of new 12.5mm tapered-edge plasterboard sheets to the underside of the joists using appropriate screws at 150mm centres; taping and jointing of all board junctions and screw heads with joint tape and filler to prevent future cracking at joints; application of a PVA bonding coat to stabilise the new board surface prior to plastering; a scratch coat of British Gypsum multi-finish plaster applied across the full ceiling area; a finish coat of multi-finish worked to a flat, smooth surface ready for decoration. The ceiling junction with the angled wall section — visible in the images — required careful mitring and boarding to maintain a clean internal angle throughout.
View Case StudyFull House Re-Skim Service – Bromley, London
Bromley, London
The full scope of work covered a complete re-skim of the entire property across all rooms, including living areas, bedrooms, hallway, and stairwell. The porch ceiling and soffit areas visible in the images required a sand-and-cement render base to be applied first before a finish skim coat could be laid over the top. Internally, all walls and ceilings were assessed for soundness before the skim coats were applied. Where existing painted plaster surfaces were present, these were washed down with a diluted PVA solution to improve adhesion and reduce suction. Hollow or blown sections of old plaster were cut back to the brick or block substrate and re-bonded before skimming. The hallway, which experiences the highest footfall and typically shows the most wear on plaster surfaces in period houses, was included in the scope. All architrave and skirting board junctions were carefully masked and cut in. The project also included the porch external soffit area, which required weatherproof render preparation before the skim was applied.
View Case StudyCeiling Replacement & Full Re-Skim – Greenwich SE10
Greenwich, London
The scope of work covered the full ceiling replacement across at least one room of this Victorian terraced house, with a re-skim applied to the walls as part of a broader full house re-skim programme. The specific tasks carried out included: stripping out the failed existing ceiling material back to the bare timber joists; routing electrical cables to ensure they were safely positioned behind the new board line; fixing new 12.5mm plasterboard directly to the existing ceiling joists using appropriate drywall screws at correct centres; taping and jointing all board joints and screw heads with Thistle joint filler and paper tape to prevent cracking at the board joints after skimming; applying a bonding coat wash to the plasterboard surface where necessary to regulate suction before the finish coat; skimming the new ceiling with two coats of Thistle multi-finish plaster — a scratch coat followed by a tighter finish coat worked to a flat, even surface; re-skimming the walls to match the new ceiling level, ensuring a consistent surface throughout the room ready for decoration.
View Case StudyKitchen Ceiling Replacement & Re-Skim – Lewisham, SE13
Lewisham, London
The full scope of work involved stripping the remaining lath and plaster from all ceiling joists across the kitchen, clearing all debris, and then cutting and fixing new plasterboard sheets directly to the exposed joists before finishing with a two-coat skim. Specifically, the work included: removing all remaining sections of original lath and loose plaster key from the joist faces; co-ordinating with the client's electrician to ensure all cables were correctly routed and positioned through the ceiling void prior to boarding; cutting 12.5mm plasterboard sheets to size and screw-fixing them at 150mm centres into the joists across the full ceiling area; taping all board joints with scrim tape before applying a bonding scratch coat to the entire ceiling surface; allowing the bonding coat to partially set before applying a finish coat of multi-finish plaster, worked back with a clean steel trowel to a flat, paint-ready surface; forming a recessed downlighter aperture visible in the finished image, with the back box left clear for the electrician to complete final connections. The walls in the kitchen were in an acceptable condition and were not re-skimmed as part of this contract — the scope was ceiling-only.
View Case StudyFull House Re-Skim & Plasterboard Wall Lining – Barnet EN5
Barnet, London
The scope covered a full re-skim across multiple rooms of the property, involving three distinct phases of work visible across the images. First, walls in the main room required full plasterboard lining — new boards were fixed directly to the bare brick using a dot and dab method, with the boards butted tightly together and jointed with scrim tape across every seam and angle. Second, the ceiling in one room — which had an original Artex-textured surface and a partially open section where boards had been removed — required the open area to be patched with new plasterboard fixed to the exposed joists, before the entire ceiling received a full skim coat of multi-finish plaster. The walls in this room also needed preparation before skimming could begin. Third, the completed ceiling skim coat in a further room was photographed at the trowelled-off stage, showing the full flat surface achieved under a temporary pendant light. Red plastic dome-head screws were visible around the perimeter, confirming the plasterboard had been fixed to a timber frame at the ceiling edge prior to skimming.
View Case StudyFull House Wall & Ceiling Re-Skim – Croydon
Croydon, London
The full scope of work covered the entire upper landing and stairwell, including all four wall faces and the ceiling. Given the scale of surface inconsistency across both walls and ceiling, every surface required preparation and a full skim coat of multi-finish plaster. The walls had been stripped of wallpaper but the old finish coat had come away in large patches, leaving an uneven substrate with varying suction levels across the same wall face. The ceiling had already received patching in several areas — visible as the darker brown sections in the images — but the overall surface was too uneven to leave as a painted finish. All surfaces therefore needed to be brought to a consistent, flat plane before skimming. The work included: stabilising all wall surfaces with a PVA bonding solution to even out suction before skimming; skim coating all four walls on the landing from skirting to cornice; skim coating the full ceiling area including tying in all previously patched zones; and ensuring clean plaster lines around the existing period coving and door architraves. No plasterboarding was required as the underlying substrate, once stabilised, was sound enough to receive a direct skim.
View Case StudyFull Room Re-Skim & Ceiling Plaster – Southwark SE1
Southwark, London
The scope covered a full re-skim of all four walls and a complete re-skim of the ceiling across the main reception room. The ceiling required water stain treatment prior to any plastering to prevent bleed-through. All exposed electrical cables were carefully worked around, with the plasterer ensuring back boxes and cable positions remained accessible throughout. The walls were re-skimmed from floor to ceiling over the existing plaster substrate, which was still sound enough to retain. A PVA bonding wash was applied to the walls before skimming to seal the porous old plaster and promote adhesion of the new multi-finish coat. The ceiling received the same PVA treatment before a full skim was applied to restore a flat, even surface free of water marking. The work progressed room section by section, with the ceiling tackled first to avoid contaminating freshly skimmed walls. Materials on site included buckets of mixed multi-finish, a plasterer's step-up, mixing buckets, and steel finishing trowels — all visible in the working images.
View Case StudyCeiling Replacement & Re-Skim – Lambeth SW8
Lambeth, London
The scope of work covered the complete reinstatement of the ground-floor reception room ceiling from bare joists through to a fully skimmed and paint-ready surface. This involved supplying and fixing new 12.5mm tapered-edge plasterboard sheets directly to the exposed timber joists across the full ceiling area. All board joints were taped using fibreglass mesh jointing tape — visible in the third image as the orange grid pattern running along every board edge and cross joint — and filled with a jointing compound to bring the surface flush before skimming. The light fitting drop was retained and routed through the new board. Once the boarding and jointing stage was complete, the entire ceiling received a two-coat application of British Gypsum multi-finish plaster, applied by hand trowel to achieve a flat, paint-ready surface. The cornicing at the perimeter was carefully protected throughout, and the finished ceiling — shown in the first image — sits flush against the retained period cornice with clean arrises at every edge.
View Case StudyCeiling Replacement & Re-Skim After Collapse – Hackney E8
Hackney, London
The full scope of work involved stripping back the remaining unstable ceiling material around the collapsed section to expose clean, solid joists across the entire ceiling area. Once all loose and compromised material was removed, new 12.5mm tapered-edge plasterboard sheets were measured, cut and fixed directly to the timber joists using drywall screws at appropriate centres, ensuring the boards were staggered to avoid continuous joints running across the ceiling. All board joints and screw fixings were taped and filled with jointing compound before the entire ceiling surface received a full skim coat of multi-finish plaster. Recessed downlight apertures were carefully marked and cut through the new boards to align with the existing electrical drops. The perimeter of the ceiling where it met the original walls was also addressed, with any ragged edges made good prior to skimming. The scope did not include decorating, which was left for the client to arrange separately once the plaster had fully cured.
View Case StudyKitchen Extension Ceiling Replacement & Skim – Islington
Islington, London
The scope of work involved a full ceiling board installation and skim coat to the angled perimeter ceiling sections surrounding the existing rooflight lantern in the kitchen extension. This included: - Fixing 12.5mm tapered-edge plasterboard directly to the exposed timber joists across all ceiling sections adjacent to the rooflight frame - Cutting boards accurately to fit the angled geometry around the lantern opening, ensuring tight board-to-board joints and clean edges against the rooflight frame - Applying jointing tape and scrim to all board joints prior to skimming - Applying a bonding or PVA mist coat where required to condition the board surfaces - Applying two coats of British Gypsum multi-finish plaster — a scratch coat worked into the board surface, followed by a finishing coat trowelled to a flat, paint-ready surface - Working around the ceiling fan electrical fixture and the rooflight glazing bars throughout the process - Protecting all kitchen units, worktops, and appliances with heavy-duty polythene sheeting secured with green masking tape throughout the duration of the works
View Case StudyCeiling Replacement & Wall Skimming – Westminster
Westminster, London
The scope of work agreed with the client covered the following: full removal of all remaining lath and plaster from the ceiling void, a thorough clean-down of the exposed joists, supply and fix of new 12.5mm tapered-edge plasterboard across the entire ceiling area, jointing and taping of all board seams and screw heads, a full two-coat multi-finish skim to the new ceiling boards, and a re-skim of the walls throughout the room. The ceiling plasterboard was fixed at 400mm centres directly to the existing timber joists using drywall screws to ensure a rigid substrate. All new boards were staggered to avoid continuous joints running the full span. Recessed lighting positions were marked and cut prior to skimming. The walls were assessed, any loose or hollow plaster was removed, and the remaining substrate was treated with a diluted PVA bonding solution before the skim coats were applied. The work was phased so that the ceiling boards were fixed and jointed before plastering commenced, allowing the jointing compound to dry thoroughly and preventing any movement that could crack the new skim coat.
View Case StudyFull House Re-Skim – Hallway & Stairwell – Camden NW1
Camden, London
The full scope covered re-plastering the entire hallway and stairwell from ground floor through to the upper landing. This included the following elements: preparation of the bare brick substrate with a bonding coat applied across all exposed areas; skimming over the new plasterboard section installed at the base of the stairwell wall; plastering the angled wall and ceiling soffit that follows the pitch of the staircase — a technically demanding area requiring careful trowel work at an acute angle; re-skimming the full-height walls running alongside the staircase on both sides; plastering the flat ceiling sections at the top and bottom landings; and finishing all surfaces with two coats of multi-finish plaster. The floor protection was kept in place throughout to protect the timber stair treads. A work lamp was used to check the wall faces at a raking angle during application, ensuring no hollows or ridges remained in the finish coat.
View Case StudyCeiling Replacement & Full Room Re-Skim – Westminster
Westminster, London
The scope covered three distinct elements: full ceiling replacement, bare brick wall plastering, and re-skimming of the remaining wall surfaces. For the ceiling, new 12.5mm plasterboard sheets were to be fixed directly to the existing timber joists, taped and then skimmed with two coats of multi-finish plaster. The bare brick wall required a scratch coat of bonding plaster applied in sections, built up to achieve a flat, plumb surface before the finish skim was applied. The remaining walls with old painted plaster required the surface to be assessed for adhesion, keyed back, and primed with a diluted PVA wash before re-skimming. The curved bay wall and its arched surround required careful hand work to follow the radius accurately. All wall and ceiling surfaces were to be brought to a smooth, paint-ready standard consistent across the entire room.
View Case StudyFull House Re-Skim & Ceiling Replacement – Bromley
Bromley, London
The scope of work for this project covered the full reception room from floor to ceiling. The ceiling required complete replacement — the old lath and plaster had been stripped back entirely, leaving exposed timber joists which needed to be boarded before any plastering could begin. New 12.5mm plasterboard was to be fixed across the full ceiling span, cut to fit neatly around the bay window projection and any existing structural timbers. The walls, which had been partially hacked back to bare substrate in places and retained failing painted plaster in others, required a full re-skim throughout. Where old plaster had been removed entirely, a bonding coat was required prior to the finish skim. The bay window reveals and internal angles needed careful attention to maintain straight, square lines given the curved nature of the bay. Electrical back boxes and cable chases that had been run during the rewire also needed to be filled, set and incorporated into the overall skim. The overall aim was to deliver flat, consistent walls and a new ceiling surface ready for decoration across the entire room.
View Case StudyWall Skimming & Re-Skim – Islington
Islington, London
The scope of work across this property covered wall re-skimming throughout multiple rooms of the Victorian terrace. Based on the images, the project involved the following elements: removing or stabilising areas of blown and delaminating plaster on the textured walls before any skim coat could be applied; preparing the existing wall surfaces by raking out loose material, brushing down, and applying a diluted PVA bonding solution to seal the porous substrate and improve adhesion; skimming all prepared wall surfaces with two coats of British Gypsum multi-finish plaster — a scratch coat worked into the substrate, followed by a trowelled finishing coat; and separately, skimming the ceiling in at least one room, which is shown in the second image in a freshly completed wet state. The ceiling skim appears to have been applied directly over an existing substrate, framed by original period coving that was masked and protected throughout. Protective dust sheets and green masking tape were used throughout to protect door frames, skirtings, and remaining furniture, as clearly visible in the first photograph.
View Case StudyFull House Re-Skim & Floor Levelling – Enfield
Enfield, London
The full scope covered re-skimming all walls and ceilings across the property — living room, bedrooms, hallways and kitchen — stripping back any loose or blown plaster before applying a fresh two-coat skim system throughout. In addition to the wall and ceiling work, the kitchen and hallway floor required a full self-levelling screed application. The sub-floor was first checked for structural integrity and any loose areas were consolidated. A bonding primer was applied across the entire floor area to ensure adhesion of the self-levelling compound. The compound was then mixed to the correct consistency and poured in sections, guided across the floor using a spiked roller to release air bubbles and encourage the material to find its own level. Beading was installed at door thresholds to contain the pour and create clean transitions between rooms. The finished screed surface seen in the image is flat, uniform and free from ridges — indicating the pour was completed in a single continuous operation to avoid cold joint lines. The total floor area covered across the kitchen and hallway corridor was approximately 12–15 square metres.
View Case Study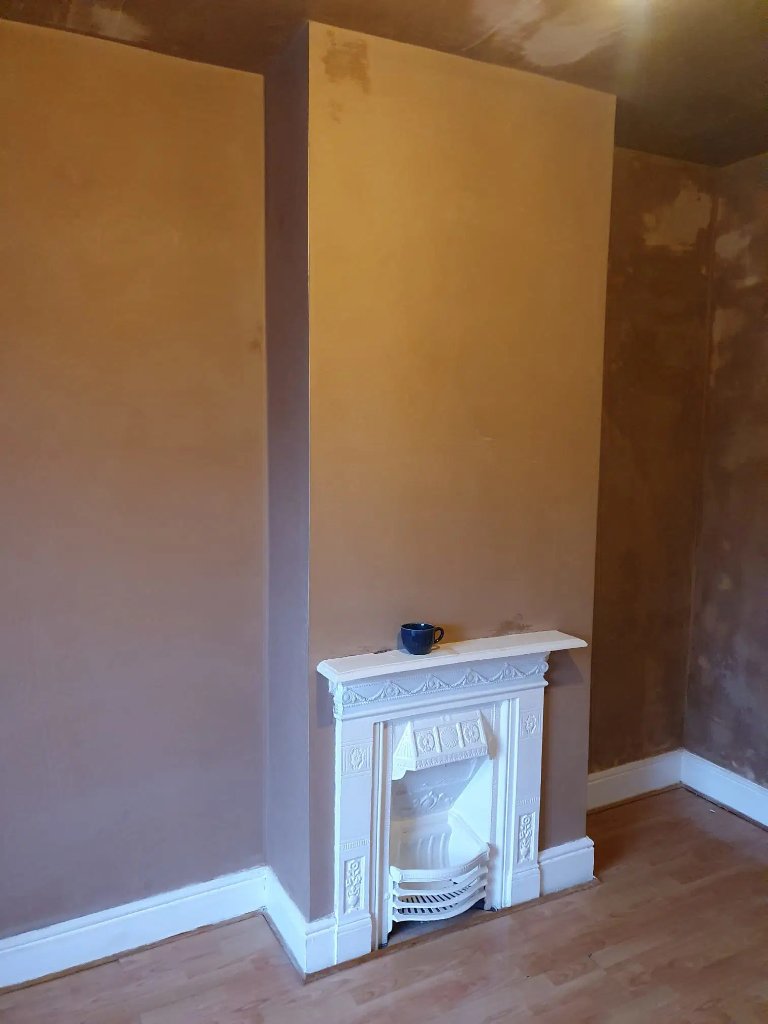
Extension Plastering — New Build Extension, Wandsworth
Wandsworth, South West London
Full plastering of a rear kitchen extension and loft conversion on a Victorian terrace in Wandsworth. The extension comprised a new kitchen/diner at ground floor and a new master bedroom with en-suite in the loft conversion. All new plasterboard installed by the builder required skim coating.
View Case Study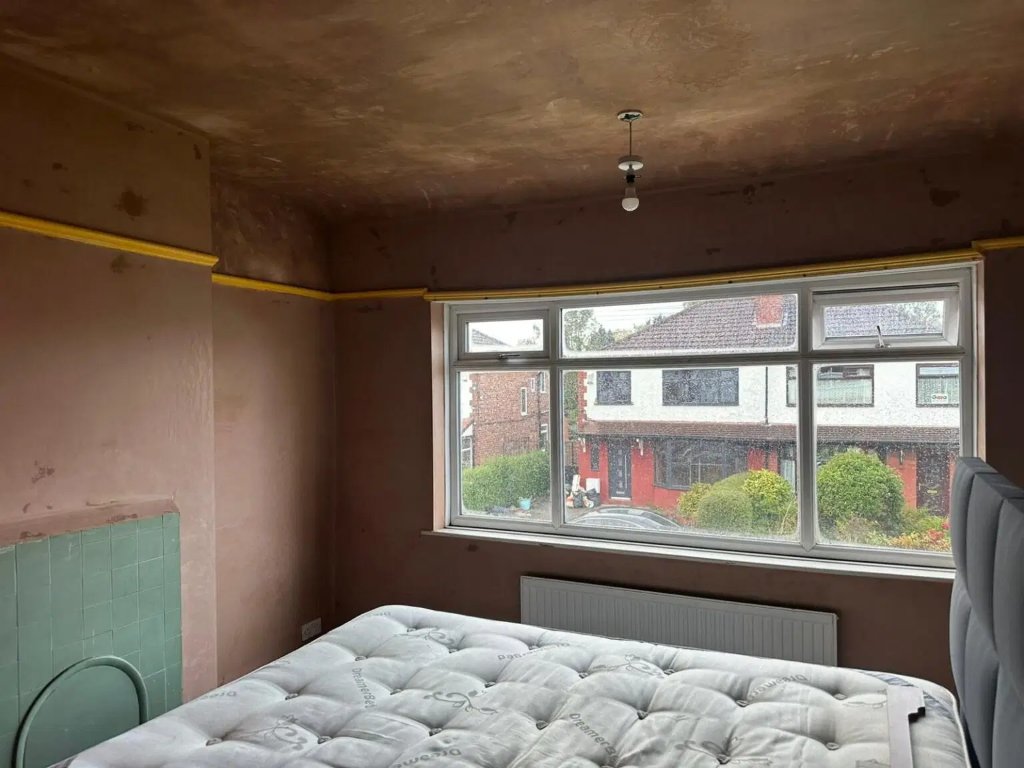
Artex Ceiling Covering — 4 Bedrooms, Greenwich
Greenwich, South East London
Covering Artex textured ceilings in all 4 bedrooms and the upstairs landing of an Edwardian semi-detached house in Greenwich. The client wanted smooth ceilings throughout the upstairs before redecorating.
View Case Study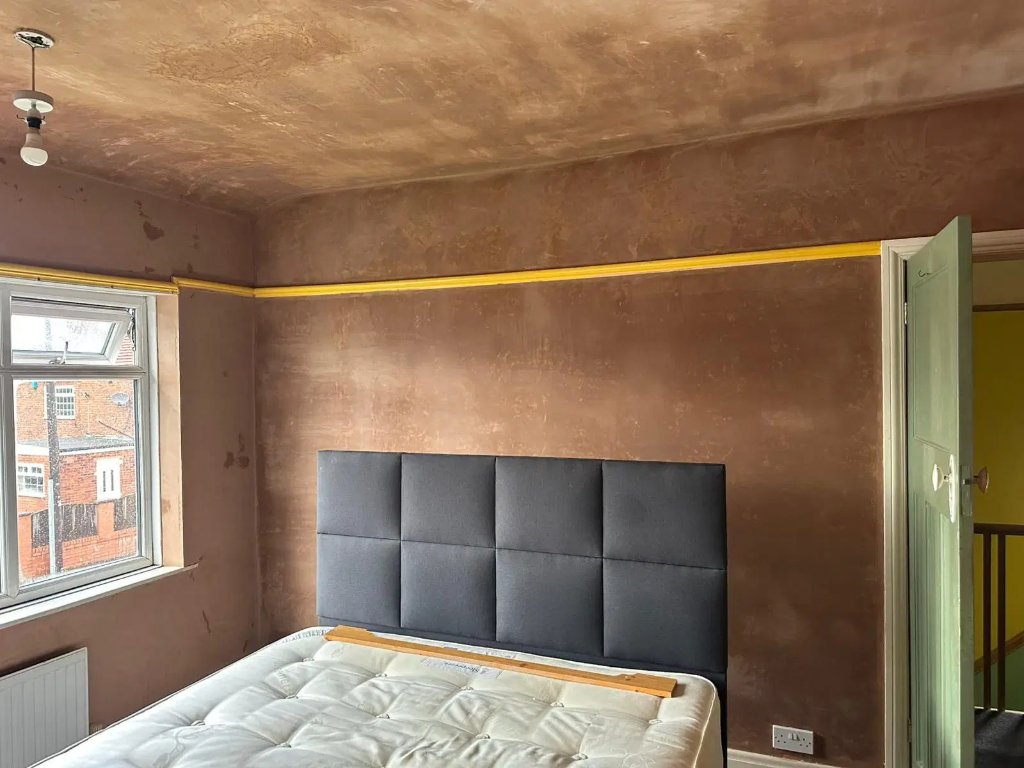
Water Damaged Ceiling Repair — Lambeth Flat
Lambeth, South London
Repair of water-damaged lounge ceiling in a ground floor flat caused by a leak from the flat above. The ceiling had sustained significant water ingress over several weeks, resulting in a large section of blown plaster approximately 1.2m x 0.8m, brown staining across the remainder of the ceiling, and softening of the plasterboard in one corner.
View Case Study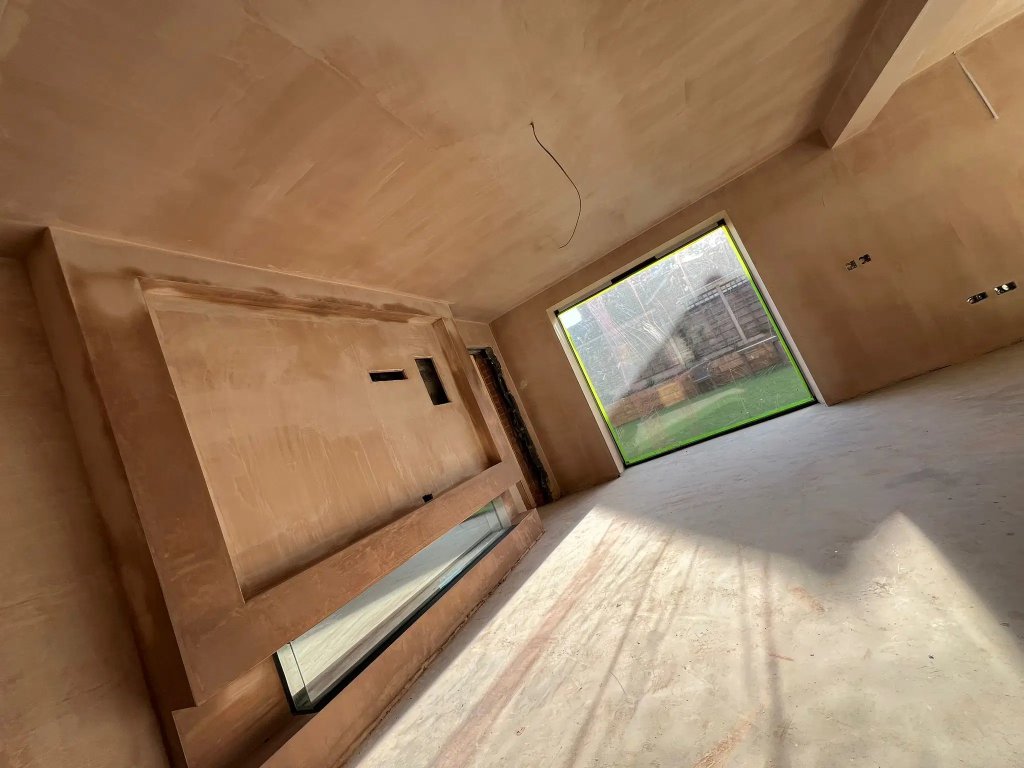
Full House Re-skim — 3-Bed Victorian Terrace, Croydon
Croydon, South London
Complete replastering of a 3-bedroom Victorian terrace in Croydon. All walls and ceilings skimmed throughout — 3 bedrooms, 2 reception rooms, hallway, and landing. The property had not been plastered since the 1980s and the existing plaster was heavily cracked, with areas of blown plaster in the hallway and front bedroom.
View Case Study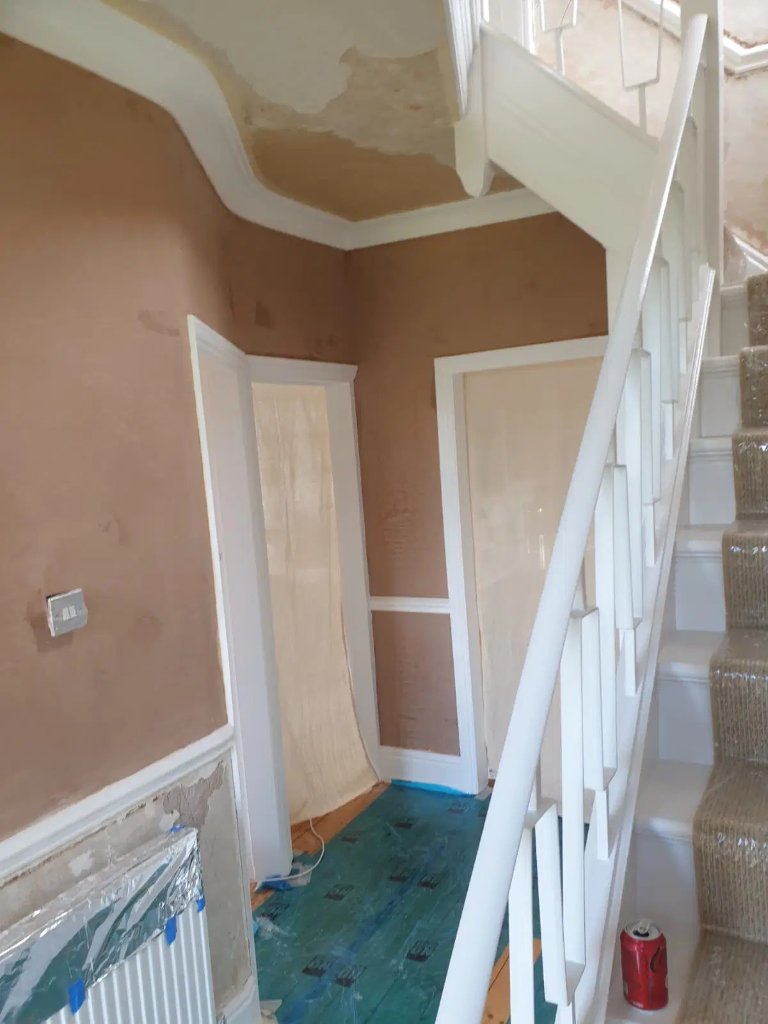
Water-Damaged Ceiling Repair — Lewisham SE13
Lewisham
Emergency repair of water-damaged ceiling in a first-floor flat in Lewisham. A leak from the flat above had caused a section of plasterboard (approximately 2m x 1.5m) to become saturated and sag. We cut out the damaged section, treated for mould, installed new plasterboard, and skim finished to match the existing ceiling.
View Case Study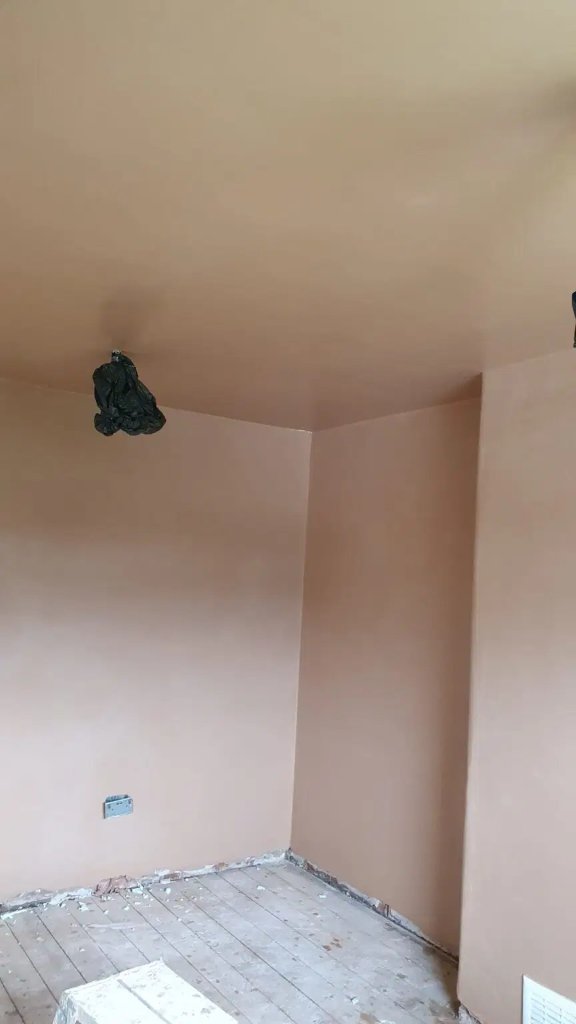
Artex Ceiling Covering — Croydon CR0
Croydon
Covering of artex ceilings throughout a 4-bedroom Edwardian semi-detached in Croydon. Used 9.5mm plasterboard overboarding method to achieve smooth ceilings without artex removal, then skim finished to perfect flatness.
View Case Study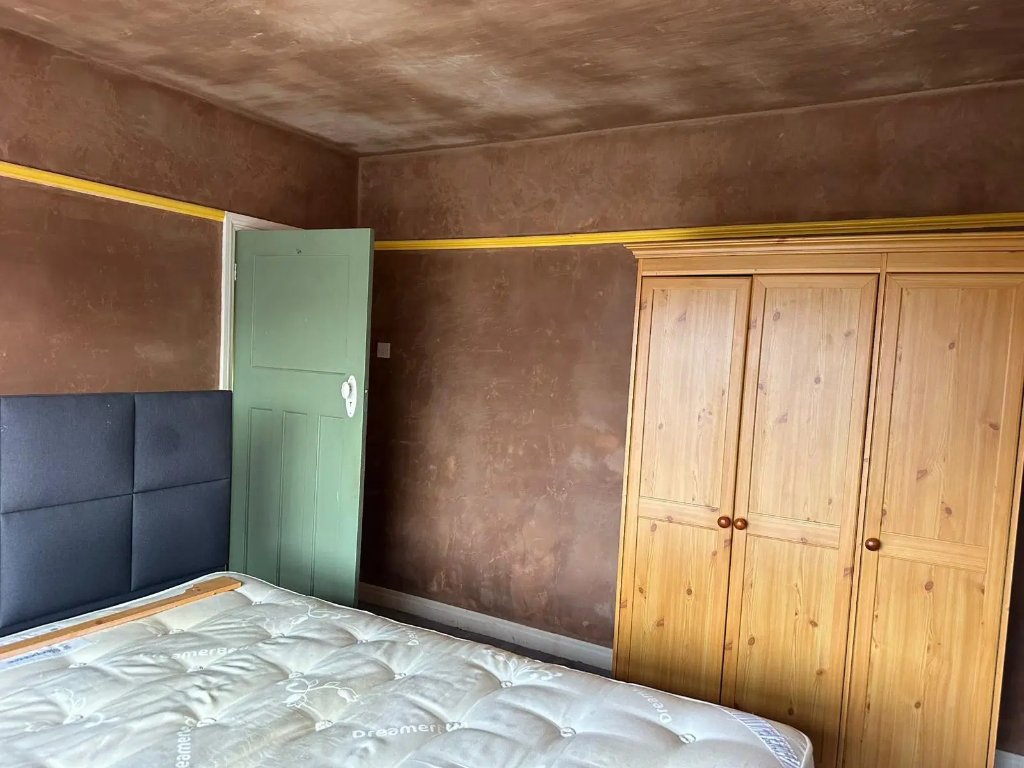
Full House Re-skim — Bromley, SE London
Bromley, South East London
Full re-skim of all walls and ceilings across 3-bedroom Victorian terrace. Prep work included removing old artex from ceilings, patching damaged plasterboard, and applying two-coat finish to all surfaces. Total area approximately 180 sqm.
View Case StudyGet a Free Quote
Fastest quote = WhatsApp photos. Form is optional.
Lightning Fast Response
We reply to all enquiries within 60 minutes
Free Site Visit
We'll assess your project at no cost
No Obligation
Receive your quote with zero pressure
Prefer WhatsApp?
Send Message on WhatsApp