
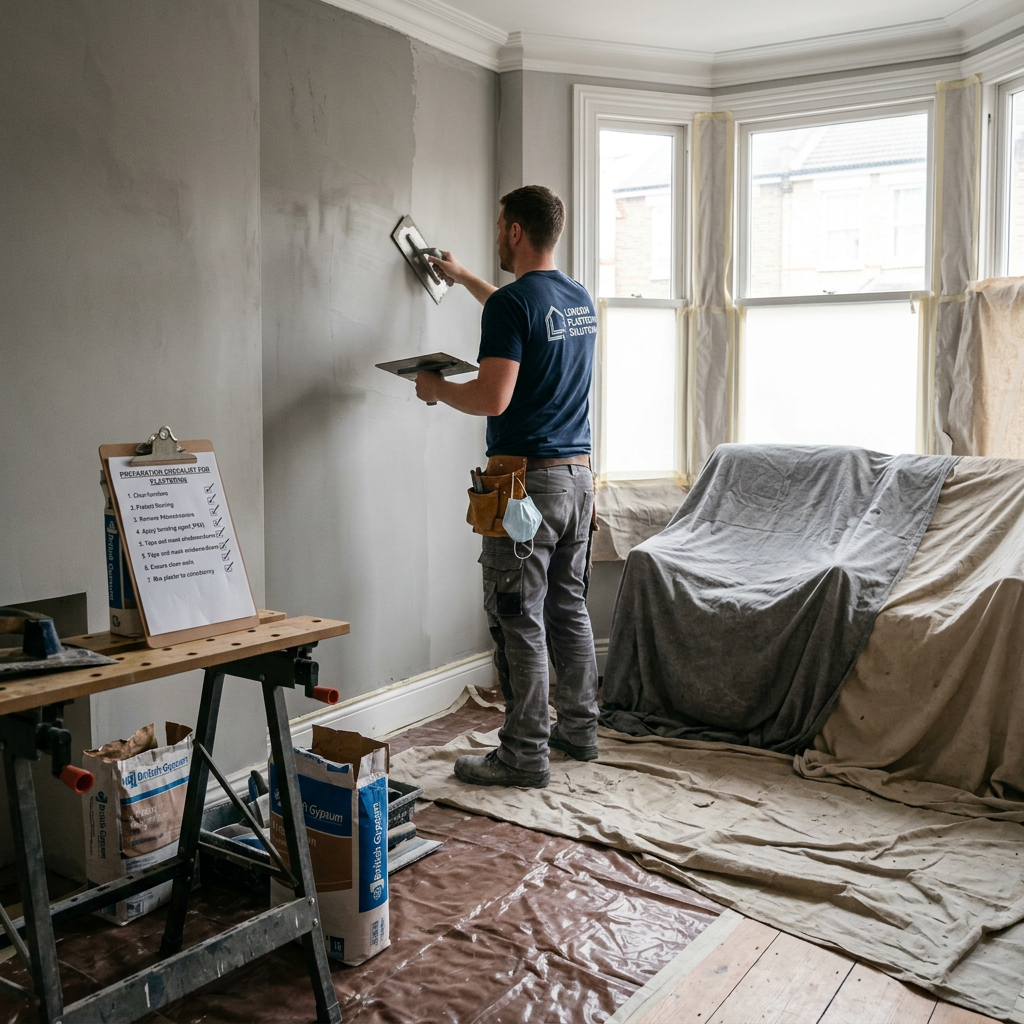
Preparing Your Home for Plasterers: London Tips
Getting your home ready before plasterers arrive is one of those jobs that's easy to overlook — and genuinely costly to ignore. Whether you're refreshing a single bedroom wall or having a full house re-skim done across multiple rooms, a bit of smart preparation makes the difference between a smooth, efficient job and a chaotic one where the team spends the first hour shifting your furniture.
This guide covers everything London homeowners, landlords, and property managers need to do before their plasterers turn up — from protecting your floors to sorting out structural issues in advance.
Why Preparation Matters More Than You Think
Plaster is a wet material applied under time pressure. Once mixed, the plasterer needs to work quickly and without interruption. A cluttered room, covered sockets, or furniture still against the walls forces them to stop, wait, or work around obstacles — all of which affects the quality of the finish and adds time to the job.
Good preparation delivers three practical benefits:
- Better adhesion and finish quality — a clean, clear substrate gives the plaster the best chance to bond and set evenly
- Faster completion — plasterers can focus on the work rather than navigating your space
- Fewer accidents and damage claims — protecting floors, fixtures, and valuables before work begins avoids disputes afterwards
When our team completed the full house re-skim in Greenwich, SE10, the client made a point of covering their new kitchen units thoroughly before we started on that room. The result? Not a mark on the units, and walls that came out flat and even throughout. Preparation and outcome are directly linked.
Step 1: Clear the Room Completely
This is the single most important thing you can do. Move all furniture, rugs, and freestanding items out of the room entirely if at all possible. If pieces are too large or heavy to relocate, push them to the centre of the room and cover them with dust sheets — but understand that central furniture still limits how freely the team can move.
Aim to leave at least 1–2 metres of clear space around the full perimeter of the room. Plasterers need to work the walls and ceiling without stepping over or around obstacles.
Wall hangings and fixtures: Take down all framed pictures, mirrors, shelves, and decorative wall items. Keep the screws and fixings together — a small labelled bag taped to the back of each item works well — so reinstallation is straightforward once the plaster has dried.
Rugs and floor coverings: Remove rugs completely. They collect plaster splash and are difficult to clean.

Ceiling boarded and skimmed, walls bonded and finished — the Newham, E6 reception room project was completed efficiently once the space was fully cleared.
Step 2: Protect Everything That Stays
Once the room is cleared as much as possible, protect what remains.
Floors
Lay dust sheets or plastic sheeting across the entire floor. Plaster drips and splashes more than most people expect, and it dries hard — getting it off bare floorboards, tiles, or carpet after the fact is a nightmare. Use painter's tape to secure the edges of the dust sheets to the skirting or floor edge, which also prevents any tripping hazards for the team.
Doors and Adjacent Rooms
Plastering creates fine airborne dust that travels further than you'd expect, particularly during any dry mixing, sanding, or when old plaster is being stripped. Seal doorways to adjacent rooms with plastic sheeting if you want to contain it. This is especially worth doing in London properties with open-plan layouts or period homes where dust can travel through original floorboard gaps.
Valuables and Electronics
Move anything delicate — electronics, artwork, ornaments — out of the room or out of the property entirely for the duration of the work. Don't leave it to chance.

On the Kensington and Chelsea kitchen replastering project, proper protection of the kitchen units allowed work to proceed without any damage to the fittings.
Step 3: Check for Structural Issues Before the Plasterers Arrive
Plastering should be one of the final trades on site — not the first. If there are underlying issues with the walls or structure, they need resolving before any plaster goes on. Applying a fresh skim over a problem surface just buries the issue and guarantees it'll fail.
Inspect your walls carefully:
- Look for cracks, bulging areas, or patches of plaster that sound hollow when tapped (a sign of blown plaster that has lost its bond)
- Check for any damp or water ingress, particularly around windows, external walls, and ceilings — active damp will prevent plaster from setting and cause it to fail quickly
- Note any areas where previous plaster crack repairs have been attempted, as these may need proper treatment rather than just a skim over the top
Complete all other trades first: Any plumbing, electrical first fix, or structural work must be finished before plastering begins. Once the plaster is on, you don't want a sparky cutting back into fresh walls to run cables.
Our Barnet full house re-skim involved stripping back a bedroom ceiling completely to the battens before re-boarding and skimming. That kind of substrate preparation — done properly before the skim coat goes on — is exactly what delivers a perfectly flat, seamless result.

The Barnet full house re-skim — walls and ceilings stripped back, re-boarded, and finished to a smooth, flat result throughout.
Step 4: Ensure Good Ventilation
Fresh plaster needs airflow to dry correctly. Rooms that are sealed up too tightly or poorly ventilated dry unevenly, which can lead to shrinkage cracks and a finish that doesn't look as crisp once decorated.
Open windows and internal doors where possible to encourage air circulation. In colder months, a gentle background heat helps — just avoid pointing a fan heater directly at fresh plaster, as forcing it to dry too quickly causes its own problems. A portable fan positioned to circulate air around the room, rather than blast one wall, is a sensible addition in particularly still or humid conditions. This matters more in some London areas — basements in Islington or ground-floor rooms in Southwark, for example, can be notably damp and benefit from extra ventilation planning.
Step 5: Remove or Protect Fixtures
Light switch covers, socket faceplates, and any surface-mounted fixtures should ideally be removed before the plasterers arrive, or at minimum protected with tape. Plaster splashed onto electrical fittings and left to set is difficult to remove cleanly. If you're having new plasterboard installed or significant work done around socket positions, discuss with your electrician whether any first-fix adjustments are needed before the board goes up.
The same applies to radiators — if they can be drained and moved off the wall, the team can work the full wall surface. If not, the area immediately behind the radiator will typically be left or worked around, and this is worth discussing with your plasterer before the job starts.
Step 6: Communicate Clearly with Your Plasterer
A quick conversation before the job begins avoids most of the common issues that slow projects down.
- Confirm the timeline: Understand how many days the work will take and plan your access accordingly. For a full house re-skim, this could be several days across multiple rooms — you'll need to coordinate access and potentially stay elsewhere.
- Discuss the plastering method: Whether it's a straightforward skim over existing plaster, bonding coat to bare brick or block, or a full strip-and-replaster, each approach has different drying times and preparation requirements. Understanding what skimming involves helps you ask the right questions.
- Flag any allergies or sensitivities: Some people react to plaster dust or the lime content in certain mixes. If anyone in the household has respiratory sensitivities, discuss this in advance so appropriate precautions can be taken.
- Plan for dust: Even with good containment, plastering generates dust. If you're staying in the property during the work, keep pets away from the area and plan for a thorough clean once the plaster has dried.

The completed Kensington and Chelsea kitchen — four walls re-plastered and a mould-affected ceiling perimeter treated, with the client home throughout. Good communication and prep made it work.
A Note on London Properties Specifically
London homes present some preparation challenges that aren't as common elsewhere. Victorian and Edwardian terraces — which make up a large proportion of London's housing stock — often have original lath-and-plaster walls that need careful assessment before any work begins. Blown or failing sections can be extensive, and what looks like a simple re-skim can turn into a strip-back-and-reboard job once the surface is properly tested.
Period properties also tend to have more fixtures, coving, and cornicing that need protecting or working around. Our Richmond upon Thames full house re-skim involved mixed substrates — bare block, painted plaster, and stripped chimney breast sections — all needing different treatment to achieve a consistent finish across the room. This kind of complexity is why pre-job communication and proper site preparation matter so much.
If you're unsure what preparation is needed for your specific property type, our team is happy to advise during the quoting stage.
Ready to Get Started?
If you're planning plastering work and want it done properly, London Plastering Service covers all 32 London boroughs. We provide clear quotes, turn up when we say we will, and leave a finish you can paint straight onto.
Get a plastering quote or explore our plastering prices guide to understand what your project is likely to cost before you call.
Frequently Asked Questions
Do I need to move all my furniture before the plasterers arrive? Ideally yes — or as much as possible. Any furniture left in the room should be moved to the centre and covered with dust sheets. Furniture against the walls prevents the team from working the full surface and can affect the quality of the finished edges.
How much space do plasterers need to work? Aim for at least 1–2 metres of clear space around the perimeter of the room. This gives the team room to set up their boards, move along the walls, and work the ceiling without obstruction.
Should I do anything about cracks before the plasterers come? Tell your plasterer about any cracks you've noticed, but don't attempt to fill them yourself before the visit. Some cracks indicate movement or structural issues that need treating properly before a new skim coat goes on — filling them with filler and skimming over can cause the new plaster to crack in the same place.
How long should I leave fresh plaster before painting? This depends on the thickness of the coat, room temperature, and ventilation, but as a general rule a skim coat needs at least 4–6 weeks before applying standard emulsion. Read our guide on plaster drying time for a full breakdown.
Can I stay in my home while plastering is being done? Yes, for most jobs — but you'll need to stay out of the room being plastered and plan for dust. Keep pets away from the area. For a full house re-skim across multiple rooms, it's worth considering whether staying elsewhere for a day or two is more practical.
Related Plastering Guides & Services
Need Professional Plastering?
Get expert plastering services in London. Free quotes within 60 minutes.