
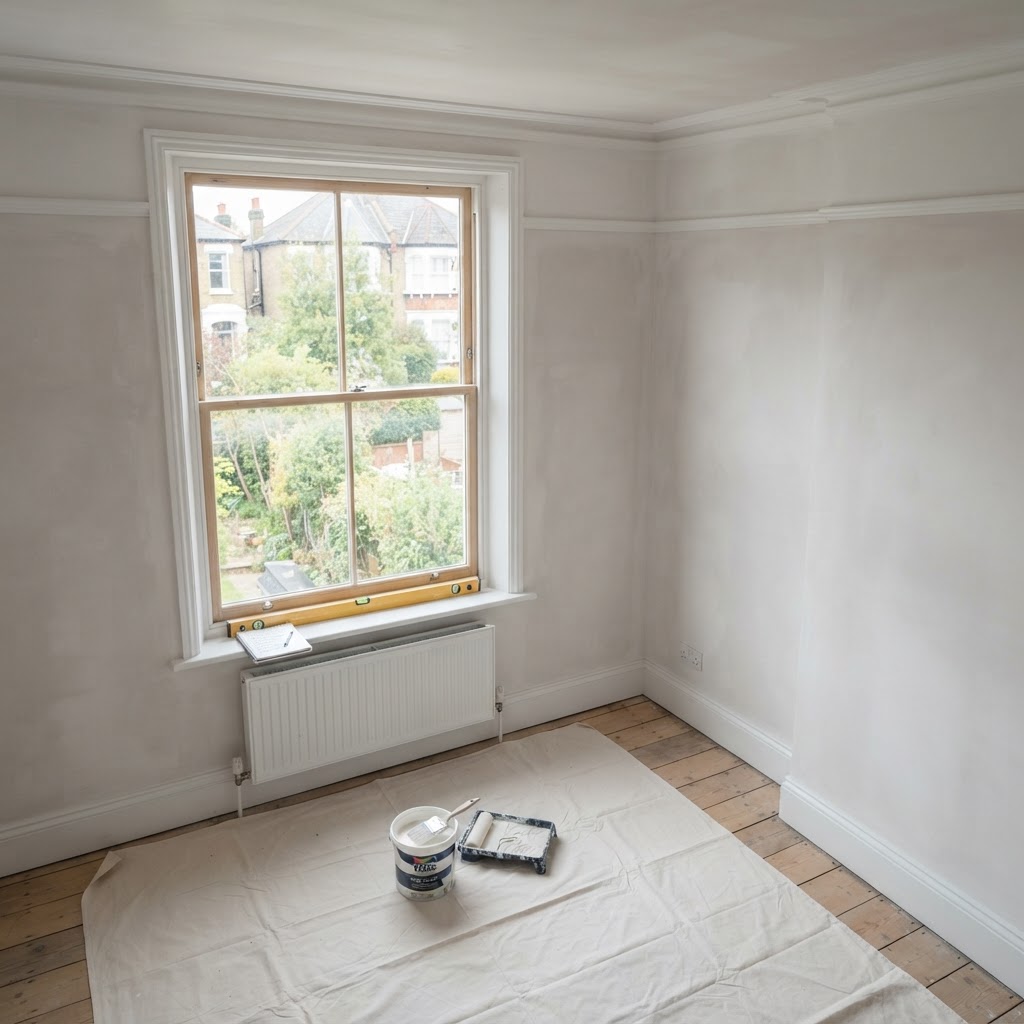
What to Do After Plastering: A Room-by-Room Renovation Guide
There's a particular moment in every renovation where the plastering is done, the plasterer has packed up, and you're standing in a freshly skimmed room wondering what on earth happens next. Do you call the painter straight away? Should the electrician come back before or after? What about the new flooring sitting in boxes in the hallway?
Getting this sequence wrong is one of the most common — and most avoidable — ways a renovation ends up costing more time and money than it needs to. This guide walks through the correct order, room by room, so you know exactly what to book, when to book it, and why.
Why the Order of Renovation Matters
Plastering sits near the beginning of almost every renovation timeline because it creates the finished surface that every other trade works against. Painters need a flat, even wall. Electricians need to know the final wall thickness before they fit sockets and switches. Even flooring installers — who might seem completely unrelated to wall condition — often need skirting boards scribed to a finished wall line rather than raw plasterboard or bare brick.
Get the order wrong and you end up paying twice. Re-skim a wall you've already painted and you're stripping the room back to the start. Fit flooring before the decorating is done and your brand-new boards are at the mercy of paint drips and boot traffic.
📋 Did You Know? Poor sequencing is cited by building surveyors as one of the top three causes of avoidable cost overruns in domestic renovation projects. Getting the order right from the start is genuinely worth the planning time.
What Happens Immediately After Plastering
Once the plasterer leaves, the immediate priority is ventilation — not painting. Fresh plaster contains a significant amount of water, and that moisture needs somewhere to go.
Open windows slightly (not wide in cold or damp weather), keep the central heating on a low setting if it's winter, and avoid sealing the room with plastic sheeting. The goal is a gradual, even drying process. Rushing it with excessive heat or a dehumidifier on full power can cause the surface to dry unevenly, which leads to cracking.
What you should not do immediately:
- Paint anything, even a test patch
- Fit skirting boards or architraves
- Return to second fix electrical work
- Bring in flooring fitters
The room needs to be left alone to breathe.
Fresh plaster needs adequate ventilation to dry evenly — resist the urge to rush the next stage.
How Long Does Plaster Take to Dry?
This is the question every homeowner asks, and the honest answer is: it depends. A small patch repair in a well-ventilated room in July is a very different proposition from a full house re-skim in a closed-up Victorian terrace in November.
As a working guide:
| Plaster Job | Typical Drying Time | Key Variables | |---|---|---| | Small patch repair (under 0.5m²) | 2–5 days | Ventilation, ambient temp | | Single wall re-skim | 5–10 days | Room size, season | | Full room re-plaster (walls + ceiling) | 10–14 days | Ventilation critical | | Full house re-plaster | 2–4 weeks per room | Work room by room | | Plasterboard with skim coat | 7–10 days | Board type matters | | Render (external or internal) | 2–4 weeks | Thicker = longer |
These are starting points, not guarantees. A room that's been rained into before plastering, or one with very thick coats applied, will take longer.
💡 Expert Tip: Don't judge dryness by touch alone. Fresh plaster that feels dry on the surface can still hold significant moisture deeper in. Always judge readiness by colour: plaster is properly dry when the entire surface has lightened to a consistent, even tone — no darker patches in corners, behind radiators, or near skirting board lines.
How to Tell When Plaster Is Ready for Painting
Colour is your most reliable guide. Wet or damp plaster looks noticeably darker — a deeper pink or brownish-grey — and often uneven, with patches around corners and edges that dry more slowly than the central areas.
As plaster dries fully, it lightens progressively to a consistent pale pink or light grey, depending on the plaster type used. When the entire surface — including corners, edges, and areas behind where radiators will go — has reached that even, light tone, it's ready for a mist coat.
Signs plaster is NOT yet ready:
- Darker patches visible anywhere on the surface
- Slightly cool or damp to touch in corners
- Less than 7 days since application (unless a small patch in warm conditions)
- Any visible moisture marks or tide lines
Signs plaster IS ready:
- Consistent, even pale colour across the whole surface
- Surface is warm and dry to the touch everywhere
- No cool spots near skirting boards or corners
- At least one full week has passed (longer in winter or poor ventilation)
⚠️ Common Mistake: Painting over plaster that's still drying traps moisture behind the paint film. It might look fine for the first few weeks — but as the hidden moisture eventually pushes through, you'll see bubbling, discolouration, or paint that peels at the edges. By that point the room may already be furnished, making it far more disruptive to fix.
Why a Mist Coat Is Non-Negotiable
Even when plaster is completely dry, it's not ready for full-strength emulsion. New plaster is highly porous — it will absorb paint unevenly, pulling it into the surface faster in some spots than others, and leaving a flat, patchy, slightly chalky finish that no amount of second coats will fully correct.
The solution is a mist coat: your chosen emulsion diluted with 10–20% clean water, applied as a single thin first coat across the entire surface. This seals the plaster's porosity and provides a stable, even base for subsequent full-strength coats.
How to apply a mist coat:
- Ensure plaster is completely dry (see above)
- Mix your chosen emulsion with 10–20% water — stir thoroughly
- Apply one thin, even coat using a roller; work systematically
- Allow to dry fully before assessing — this typically takes 4–6 hours
- The surface will look slightly uneven and matte — this is completely normal
- Apply your first full-strength coat once the mist coat is dry
✅ Before You Paint Checklist:
- [ ] Plaster is fully dry — consistent pale colour throughout
- [ ] Minimum 7 days since plastering (10–14 days for full re-plaster)
- [ ] Mist coat mixed and ready (emulsion + 10–20% water)
- [ ] All dust and debris removed from the room
- [ ] Skirting boards not yet fitted (easier to paint before)
- [ ] Electrical socket and switch boxes in place but faceplates not yet fitted
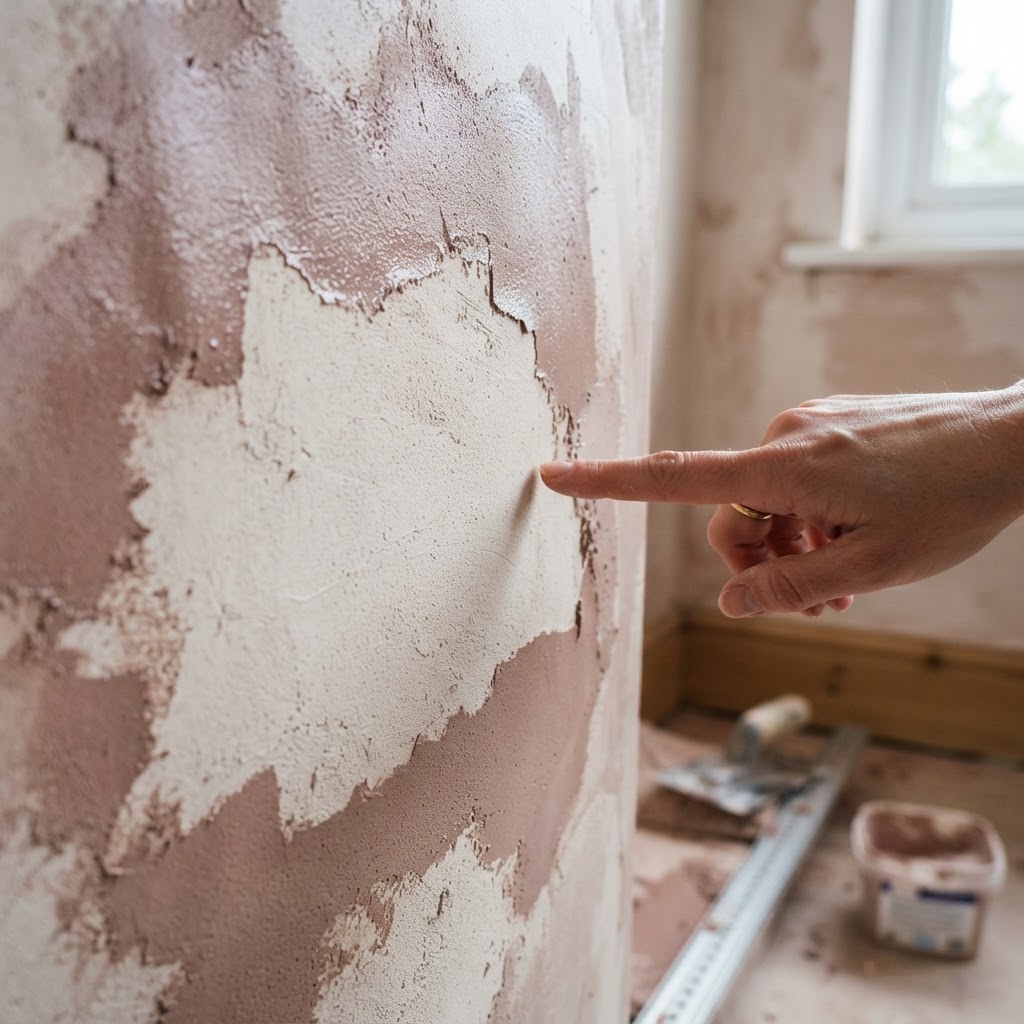 Judge dryness by colour: the wall is ready when the entire surface reaches a consistent, even pale tone.
Electrical Work: First Fix vs Second Fix
Electrical work in a renovation is split into two distinct stages for a good reason — and understanding that split is key to scheduling correctly around your plastering.
| Stage | When It Happens | What's Done | |---|---|---| | First Fix | Before plastering | Cables run inside walls and ceilings, back boxes for sockets and switches installed, consumer unit work | | Plastering | After first fix | Walls and ceilings skimmed over the cabling; back boxes left proud of the surface | | Drying + Mist Coat + Painting | After plastering | Walls painted before any fittings go on | | Second Fix | After painting | Faceplates, sockets, switches, light fittings connected and fixed |
The reason for this split is simple: if you fit light switches and socket faceplates before the walls are painted, they're going to be covered in paint marks, or at the very least require very careful cutting-in that's easy to get wrong. Having the fittings go on last — onto a finished, painted wall — means they go in clean, looking exactly as they should.
If electrical work wasn't included in your original renovation plan but you've since decided to add sockets or reposition lights, this is best discussed with an electrician before the plastering stage, not after. Chasing cables into a finished, painted wall is significantly more disruptive and expensive than running them before the plasterer comes.
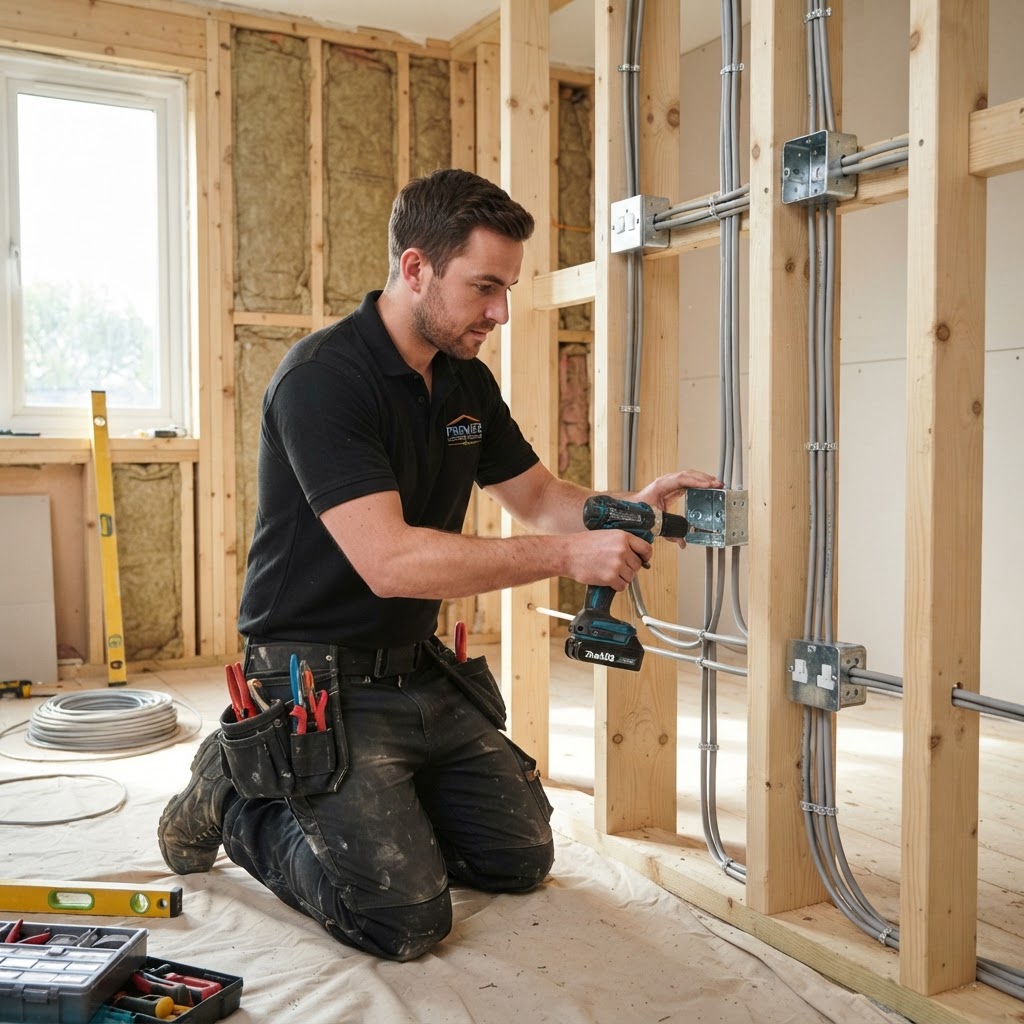 All cable runs and back boxes should be in place before the plasterer starts — this is first fix.
Plumbing, Carpentry and Joinery
The same first fix / second fix logic applies to plumbing. Any pipework that runs inside walls — radiator tails, bathroom supply pipes, waste runs — needs to be installed and pressure-tested before the plasterer arrives. Plastering over pipework that turns out to have a small leak is an expensive mistake.
Tiling is a slightly different case. Tiled areas (shower enclosures, bathroom walls, kitchen splashbacks) don't need to be painted, so tiling can happen after plastering but before final decoration of the same room. In wet rooms, the tiler needs the plaster to be fully dry before starting.
Carpentry and joinery — new internal doors, built-in wardrobes, window boards, shelving — generally comes after the surrounding walls are painted. The reason is practical: cutting in cleanly around new joinery, especially where it meets the wall at an angle, is harder and messier than painting first and then fitting the joinery to a finished surface. The carpenter can then fill and touch up any small gaps or nail holes at the end.
When to Lay Flooring
As a firm general rule: flooring goes in after painting is complete.
Painting always creates some splatter, dust and drips, even with careful masking. A subfloor or existing floor covered with dust sheets is easy to protect. A brand-new engineered oak floor or luxury vinyl tile is not. The masking required to protect new flooring properly also significantly slows down the painting job.
The main exception is where the finished floor height affects other elements:
- If new flooring raises the floor height significantly, this can affect door clearance — so doors may need to be trimmed before flooring goes down
- If floor height affects how skirting boards are scribed or fixed, this needs to be confirmed before the carpenter fits them
- Underfloor heating systems, where the heating element itself affects the subfloor height, need to be confirmed early
Outside of these edge cases, leave the floor until after the decorating is complete.
 Flooring should always go in after painting is complete — protecting a subfloor is far easier than protecting a new floor.
Skirting Boards and Architraves
Skirting boards occupy an interesting middle position in the renovation order. They go in after plastering — the plasterer will have stopped a few millimetres above the floor level, and the skirting covers that junction — but the question is whether they go in before or after painting.
The recommended approach:
- Fit skirting boards after plastering (once plaster is dry)
- Fill and prime the back of the skirting where it meets the wall
- Caulk the top edge of the skirting where it meets the wall
- Paint walls first — getting down to the top of the skirting with a brush
- Then paint the skirting in its final gloss or satinwood finish
This gives you a clean, continuous caulked-and-painted line between wall and skirting. Fitting skirtings after the walls are fully painted forces an awkward cutting-in job along the join that rarely looks as sharp.
Architraves (the mouldings around door frames) follow the same logic: fit after plastering, fill and caulk, paint walls first, then architraves.
Room-by-Room Renovation Timeline
Every room is slightly different, but the underlying sequence remains consistent. Here's the standard flow:
Strip Out / Preparation
        ↓
First Fix Electrics & Plumbing
        ↓
Plastering
        ↓
Drying Period (7–14+ days)
        ↓
Mist Coat
        ↓
Fit Skirting Boards & Architraves
        ↓
Caulk & Fill
        ↓
Paint Walls & Ceilings (full coats)
        ↓
Second Fix Electrics & Plumbing
        ↓
Carpentry & Joinery
        ↓
Flooring
        ↓
Final Decoration & Dressing
| Room | Key Sequencing Notes | |---|---| | Living Room | Mist coat before any built-in shelving; flooring last | | Kitchen | Plumbing first fix essential before plastering; tiling before painting remaining walls | | Bathroom | Waterproofing and wet room membrane before tiling; tiling before painting | | Bedroom | Second fix lighting after painting; fitted wardrobes after painting | | Hallway | Flooring last — most traffic during the renovation; staircase balustrade after decorating | | Extension | Insulation and first fixes before boarding and plastering; heating system pressure-tested first |
A well-planned renovation sequences each trade to avoid costly rework.
Coordinating Trades: The Biggest Challenge
Getting the work done correctly is one thing. Getting the right tradespeople booked in the right order, at the right time, is often the harder problem.
Most renovations involve at least four or five different trades — plasterer, electrician, plumber, decorator, flooring fitter — each with their own availability and lead times. If your plasterer finishes two weeks earlier than expected and your decorator isn't available for another three weeks, that's three weeks of a dry, paint-ready room sitting idle.
Homeowners managing this themselves generally find the process easier when they can view and compare multiple trades in one place, booking each one as the previous stage is genuinely ready rather than guessing in advance. TraderStreet is built for exactly this: a single platform where you can search local plasterers, electricians, flooring fitters and other trades side by side, without juggling half a dozen separate directories. Their search page lets you filter by trade and location so you're looking at available, relevant people from the start.
For tradespeople reading this: the renovation sequence described above generates a steady, predictable flow of sequential work — one trade finishing makes the next one necessary. Listing as a premium trader on TraderStreet puts your profile in front of homeowners at exactly the stage they need your particular trade.
Common Renovation Sequencing Mistakes
These come up repeatedly, and most trace back to impatience or poor planning:
1. Painting before the plaster has dried The single most common mistake. It looks fine at first. Three weeks later, as the trapped moisture pushes through, the paint starts to bubble and peel. The only fix is stripping back and starting again.
2. Fitting flooring before decorating is finished Creates endless masking complications and risks damage to a new floor finish from paint drips, boot traffic and equipment.
3. Calling the electrician back for second fix too early If the paint hasn't cured — particularly gloss or satinwood on woodwork — even careful fitters can leave fingerprint marks or small indentations. Wait until the paint is properly hard, not just dry to touch.
4. Skipping the mist coat Results in uneven absorption, patchy finish, and typically two extra coats of paint to get a result that should have taken two from the start.
5. Tiling straight onto freshly plastered walls Plaster that hasn't fully dried will continue to move very slightly as it completes its drying process, which can crack grout lines or even compromise the tile bond. Allow full drying time before tiling.
6. Not confirming floor heights before fitting doors and skirtings A common oversight in older properties where floors are being levelled or where underfloor heating adds height. Much easier to check and adjust before everything is fitted.
Professional Tips from London Plasterers
A few pieces of advice that experienced London plasterers consistently pass on to homeowners:
-
Don't use a dehumidifier on full power in a freshly plastered room. Drying too fast causes the surface layer to dry before the deeper plaster, leading to shrinkage cracks. A steady, gentle airflow through open windows is better.
-
Keep the heating on a low, consistent setting in winter — not off and on. Fluctuating temperatures affect drying time and can cause uneven results.
-
If you see hairline cracks appearing as the plaster dries, this is usually normal shrinkage and can be filled before mist coating. Wider or jagged cracks may indicate an issue worth discussing with your plasterer.
-
Always mist coat before fitting skirting boards — this way any mist coat that drips onto the floor doesn't land on a freshly finished skirting board that's already been painted.
-
Let your plasterer know in advance about any recessed lighting positions, TV aerial cables running along the wall, or areas where you want flush boxing to hide pipes — these are much easier to accommodate during the plastering stage than after.
For professional plastering advice specific to London properties — including period properties, Victorian terraces, and Artex-covered ceilings — London Plastering Service offer a free quote and will advise on the correct sequence for your specific job.
An experienced plasterer will advise on sequencing for your specific property — worth asking before they start.
Frequently Asked Questions
How long should I wait after plastering before painting? For a full room re-plaster, allow a minimum of one to two weeks, and longer in winter or poor ventilation. Small patch repairs can dry in two to five days. Always judge readiness by colour — an even, consistent pale tone across the entire surface — rather than by a fixed number of days. If you're in any doubt, wait another few days.
Do I actually need a mist coat, or is it optional? It is strongly recommended and, in practice, non-optional if you want a professional-looking finish. New plaster is highly porous and will absorb full-strength emulsion unevenly, leaving a flat, patchy result. The mist coat seals the surface and ensures that your full-strength coats go on evenly. Skipping it typically results in needing extra coats to achieve the same outcome.
Should flooring be fitted before or after painting? After, in almost all cases. Protecting a subfloor from paint drips is straightforward; protecting a brand-new floor finish is not. The exception is when the finished floor height affects door clearance or skirting board fitting — confirm this early and adjust accordingly.
Can my electrician do second fix before the walls are painted? Technically, yes — but it's not recommended. Fitting socket faceplates and light fittings onto an unpainted wall, then painting around them, requires very careful cutting-in and risks smearing wet paint on new fittings. Standard practice is to paint first, then second fix, so fittings go on clean.
What's the most common mistake homeowners make with plastering? Painting too soon. It's driven by the natural desire to see visible progress — fresh plaster looks like a finished wall, and the temptation to get colour on it is understandable. But moisture trapped behind paint doesn't just stay there quietly; it eventually forces its way through, often weeks or months later, creating bubbling, discolouration and in some cases requiring the plaster to be redone.
My plaster has small hairline cracks. Is that normal? Fine hairline cracks during drying are common and normal — they're the result of plaster shrinking slightly as it loses moisture. These can be filled with a fine surface filler before mist coating and will disappear under paint. Wider cracks (more than a millimetre), cracks that continue to grow, or cracks accompanied by movement in the wall are a different matter and worth discussing with your plasterer or a surveyor.
Is it worth hiring a main contractor to manage all the trades, or better to book them separately? Both approaches work. Larger, complex renovations — full house refurbishments, extensions, structural work — often benefit from a main contractor who manages all the sequencing and takes responsibility for the programme. For smaller projects, or homeowners with more time to plan, booking trades separately as each stage completes is often more cost-effective. Platforms like TraderStreet make this easier by bringing multiple trades into one searchable place, so you're not managing half a dozen separate directories.
Can I speed up plaster drying time? Within limits. Good ventilation (windows slightly open, air circulating) and a consistent low heat in cold weather will help. What you should avoid is aggressive drying — powerful dehumidifiers, industrial heaters, or sealing the room then blasting it — as this can cause the surface to dry faster than the deeper plaster, leading to cracking. Steady and gradual is always better than fast.
Key Takeaways
- Plastering comes first — it's the foundation for every other finishing trade
- Wait for full drying before doing anything else — judge by even colour, not touch
- Always mist coat before full-strength emulsion; it's not optional
- First fix electrics and plumbing happen before plastering; second fix happens after painting
- Skirting boards go in after plastering, before the final paint coat
- Flooring is always last, after all painting and second fix work is complete
- Don't rush any stage — the cost of doing it wrong is always higher than the time saved
Printable Renovation Checklist
| Step | Trade | When | ✓ Done | |---|---|---|---| | Strip out and preparation | Owner / labourer | Start | ☐ | | First fix electrics | Electrician | Before plastering | ☐ | | First fix plumbing | Plumber | Before plastering | ☐ | | Plastering | Plasterer | After first fixes | ☐ | | Drying period | — | 7–14+ days | ☐ | | Mist coat | Decorator / owner | After full drying | ☐ | | Fit skirting boards & architraves | Carpenter | After mist coat | ☐ | | Caulk and fill | Decorator / owner | Before full coats | ☐ | | Paint walls and ceilings | Decorator | After caulking | ☐ | | Second fix electrics | Electrician | After painting | ☐ | | Second fix plumbing | Plumber | After painting | ☐ | | Tiling (bathrooms/kitchen) | Tiler | After plastering | ☐ | | Carpentry and joinery | Carpenter | After painting | ☐ | | Flooring | Flooring fitter | Last stage | ☐ | | Final decoration and dressing | Owner | At completion | ☐ |
Getting the sequence right is the single most effective thing you can do to keep a renovation on time and on budget. It requires a little planning upfront, but the alternative — undoing finished work to fix an earlier step — is far more costly and disruptive. Take it one stage at a time, confirm each stage is genuinely complete before moving to the next, and the whole process becomes considerably less stressful.
Related Plastering Guides & Services
Need Professional Plastering?
Get expert plastering services in London. Free quotes within 60 minutes.