
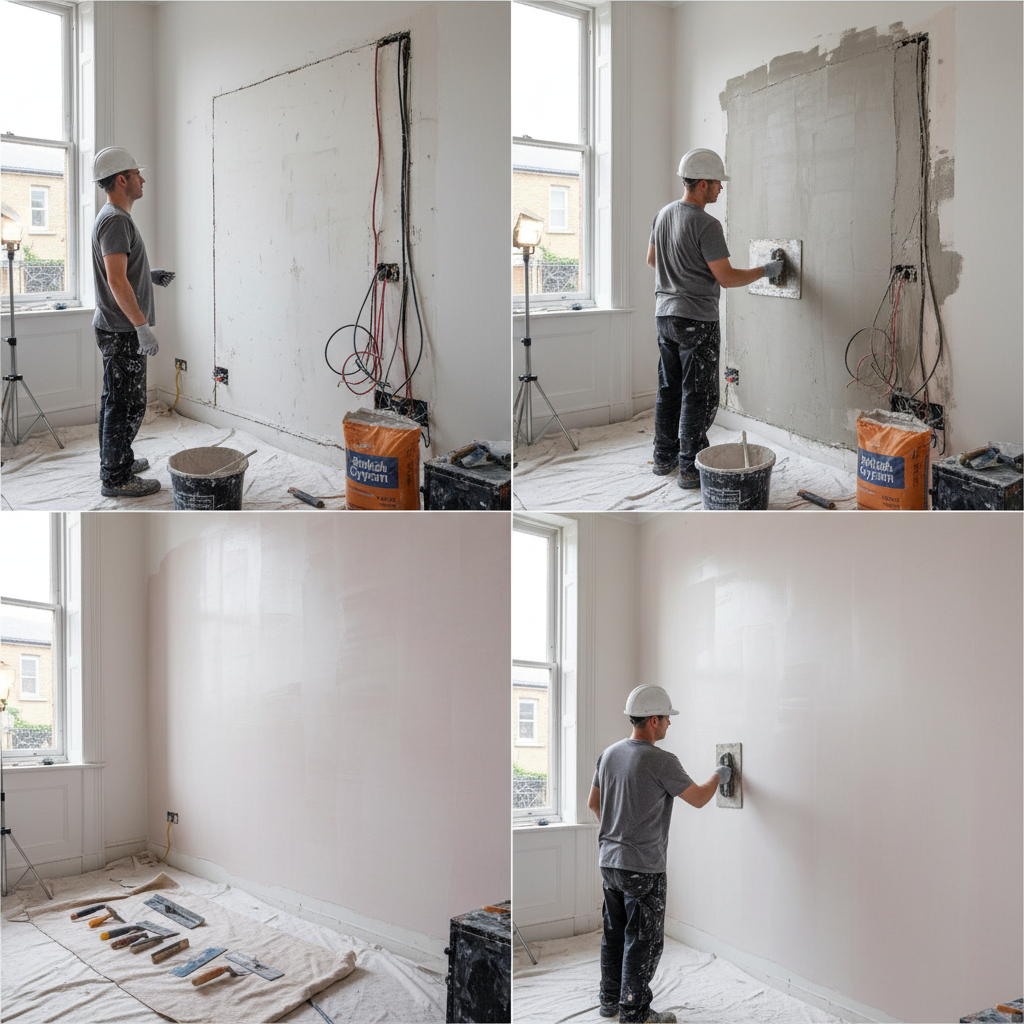
Plastering After Rewiring: Complete Homeowner's Guide
Plastering After Rewiring: A Complete Guide for Homeowners
Imagine this: you've just finished a major rewire in your charming London flat in Islington. The wires are neatly tucked away, and the light fixtures shimmer with the promise of a well-lit future. But then you look at your walls. They’re the unfortunate victims of the process — cables dangle, plaster is cracked, and a fresh layer of plastering seems inevitable. If you’re nodding along, you’re in the right place!
Plastering after rewiring may seem daunting, yet it’s a necessary step to restore your home’s beauty and integrity. In this complete guide, we’ll explore everything you need to know about plastering after rewiring, from the process and materials to costs and professional help. Let’s dive in!
Understanding Why Plastering is Essential After Rewiring
When you rewire your home, it usually involves opening up walls to accommodate new wiring. While this is essential for safety and functionality, it can leave your walls looking disheveled. Here's why plastering is crucial after rewiring:
- Restore Aesthetics: No one wants to live with exposed wires and patched-up walls.
- Prevent Damage: Proper plastering can help protect your walls from moisture and other environmental factors.
- Increase Property Value: Well-finished walls contribute to the overall value of your home.
The Plastering Process After Rewiring
Step 1: Assess the Damage
Before doing any plastering, assess how extensive the damage is. Inspect each area where rewiring occurred:
- Look for cracks, holes, or any uneven surfaces.
- Check if there are any remaining wires or fixtures that need attention.
Step 2: Gather Your Supplies
You can either choose to DIY or hire a professional plasterer. If you’re going the DIY route, you’ll need:
- A plastering trowel
- Plaster mix (either pre-mixed or powdered)
- A bucket for mixing
- A hawk (to hold plaster)
- Sandpaper (for smoothing)
- Water (for mixing and cleanup)
Step 3: Prepare the Area
- Protect Your Floors: Use drop cloths or old sheets to cover your floors.
- Clean the Walls: Remove any dust, debris, or loose plaster from the area you're working on.
Step 4: Mix Your Plaster
- Follow the manufacturer's instructions to mix your plaster to a smooth, thick consistency — not too runny!
- If it’s your first time, consider practicing on a scrap piece first.
Step 5: Apply the Plaster
- Start with a thin coat first, filling in any holes or gaps from rewiring.
- Use firm, even strokes to apply the plaster with your trowel.
- Allow the first coat to dry completely (around 24 hours), then apply a second coat.
Step 6: Smooth It Out
- Once the plaster is dry, use sandpaper to smooth out any uneven surfaces. For a flawlessly smooth finish, consider a third skim coat.
Step 7: Final Touches
- After sanding, wipe the walls with a damp cloth to remove dust.
- Paint the walls, and voila! Your rewire is now camouflaged behind beautiful plaster.
How Much Does Plastering After Rewiring Cost?
The cost to plaster walls after rewiring can vary based on several factors:
- Size of the Area: The larger the space, the higher the cost.
- Material Used: Different plaster materials have different price tags.
- Labour Costs: Hiring professional plasterers in London can range from £25 to £45 per hour.
Estimated Costs
- DIY Costs: Supplies may cost around £50 to £150, depending on what you need.
- Professional Plastering: Expect to pay between £400 to £800 for a standard room (15m²).
Practical Tips for Homeowners
- Choose the Right Plaster: Use a multi-finish plaster for interior walls for a smooth finish.
- Stay Patient: Plastering requires time and attention. Rushing can lead to mistakes.
- Consider Hiring Professionals: If you feel overwhelmed, hiring local professionals can save time and ensure top-quality work. You can find a trusted team through our page on Local plasterers.
FAQ
Q1: Can I plaster over old paint?
Yes, you can plaster over old paint, but make sure the surface is clean and free from any flaking paint. It's advisable to score or sand the painted surface slightly to help the new plaster adhere better.
Q2: How long does plaster take to dry?
Typically, plaster takes about 24 to 48 hours to dry completely, depending on the thickness of the application and the room's humidity and temperature.
Q3: What happens if I don’t plaster after rewiring?
Not plastering after rewiring can lead to incomplete finishes, compromised wall integrity, and even lower property value. It might also present hazards if wires are exposed.
Q4: how can I find a professional plastering service in London?
Finding a professional plastering service is easy! Check out our About page to learn more about our expert team and how we can help with your plastering needs.
Q5: Are there any specific permits needed for rewiring in London?
Yes, rewiring often requires electrical safety certificates, especially in rental properties, to comply with local regulations. Always consult a qualified electrician.
Conclusion
Rewiring your home can seem daunting, especially when it leaves your walls needing attention. But with the right knowledge and tips, plastering can be a rewarding DIY task or a professional job well worth the investment. Remember to assess your project's scope, decide whether to DIY or hire a professional, and seek guidance where needed.
For trusted, high-quality plastering services in London, don’t hesitate to reach out to us at London Plastering Service! Your walls will thank you, and you'll restore your home’s charm and comfort in no time.
Find more plastering tips and guides on our Blog!
Related Plastering Guides & Services
Need Professional Plastering?
Get expert plastering services in London. Free quotes within 60 minutes.