
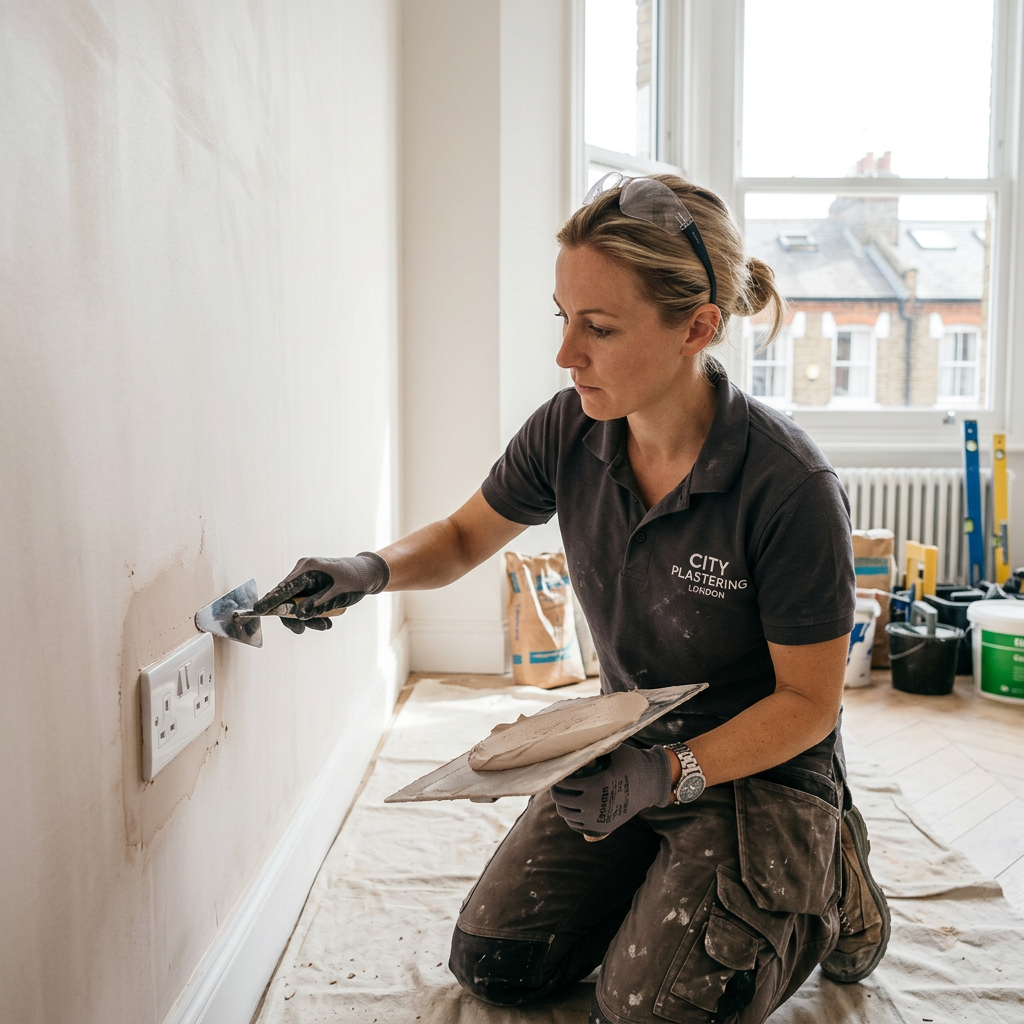
Mastering Plastering: A Guide to Sockets and Switches
How to Plaster Around Sockets and Switches
Imagine stepping into your newly adorned London home, freshly decorated with smooth plastered walls that not only shine but also frame your beautiful electrical sockets and switches perfectly. Attention to detail is critical, and knowing how to plaster around sockets and switches can be the difference between a professional-looking finish and a DIY disaster. In this extensive guide, we'll walk through the steps to achieve that smooth, polished look, exactly how to avoid common mistakes, and some pro tips that can save you time and money.
Why Plastering Around Sockets and Switches Matters
When embarking on home improvement projects in areas like Chelsea or Camden, it’s not uncommon to overlook small details like plastering around sockets and switches. However, these little spots can ruin the overall aesthetic if not done correctly. A poorly finished socket can detract from the beauty of your newly plastered walls, highlighting any imperfections and making your work appear haphazard.
Tools and Materials Needed
Before we dive into the steps, here's a quick list of essential tools and materials you'll need:
- Plaster (consider using ready-mixed for convenience)
- Plastering trowel
- Jointing knife or scraper
- Masking tape
- Sponge or wet rag
- Sandpaper or a sanding block
- Multitool for electrical panel adjustments (if necessary)
Safety First
Safety is paramount. Ensure that the power is turned off at the circuit breaker before starting any work around electrical sockets. Use a voltage tester to double-check that no electricity is flowing.
Step-by-Step Guide to Plastering Around Sockets and Switches
Step 1: Prepare the Area
- Turn Off Electricity: Make sure the electricity is completely turned off.
- Remove Covers: Take off the socket and switch covers using a screwdriver. Store these safely to prevent damage.
- Clean the Surface: Use a sponge or damp cloth to clean around the sockets to remove any dirt or grease.
- Masking Tape: Apply masking tape around the edges of the sockets and switches to protect them from plaster.
Step 2: Mix Your Plaster
Whether you choose to use a ready-mixed plaster or traditional gypsum plaster, follow the instructions carefully. If you’re new to plastering, we recommend starting with a pre-mixed option available from local DIY stores across London, costing around £15-£30 per bag, depending on the brand and quality.
Step 3: Apply Plaster
- Load Your Trowel: Dip your plastering trowel into the plaster and scoop out an ample amount.
- Smooth Application: Gently press the plaster onto the wall around the socket, starting from the top and working downwards.
- Work it In: Ensure the plaster fills any gaps and smooths out against the socket, using the edge of the trowel for precise lines.
- Feathering Technique: As you extend outwards from the socket, use less plaster to create a feathered edge that gradually blends into the wall.
Step 4: Finishing Touches
- Smoothing: After applying the plaster, smooth it with the trowel or a jointing knife. This helps to avoid lumps and bumps.
- Cleaning Up: Clean any excess plaster from the surface of the socket with a wet sponge.
- Let it Cure: Allow it to dry according to the manufacturer's instructions.
- Sanding: Once completely dry, lightly sand the area for a smooth finish.
- Reinstall Covers: Carefully reattach the socket and switch covers once the plaster is set and smooth.
Practical Tips for Best Results
- Practice Makes Perfect: If you’re a beginner, practice on a scrap piece of plasterboard.
- Temperature Matters: Ensure your work area isn’t too cold or too hot, as this can affect drying times and adherence. Ideal room temperature is around 15-20°C.
- Time-Saving Tools: Consider using an electric mixer for large batches of plaster. It helps mix the plaster evenly and quickly.
FAQ
## FAQ
Q1: Can I plaster over existing sockets and switches?
A1: It’s not advisable to plaster directly over existing sockets and switches. Always remove the covers and ensure a clean surface for plaster application to avoid issues with electrical components.
Q2: How long does plaster take to dry?
A2: Standard plaster usually takes about 24-48 hours to dry fully, but it can vary based on the thickness applied and environmental conditions. Lightly touching the surface can help you gauge dryness.
Q3: Should I use a primer before plastering?
A3: While not always necessary, applying a primer can help improve adhesion, especially in areas prone to moisture, such as kitchens and bathrooms.
Q4: What is the average cost of plastering a room in London?
A4: Costs can vary significantly based on the type of plastering but expect to pay around £300-£600 for a standard room. For a tailored quote, consider consulting professionals like London Plastering Service.
Q5: Do I need professional help for plastering?
A5: While it's certainly possible to do it yourself, hiring professionals from trusted services such as Plasterers Near Me ensures a high-quality finish, especially for tricky areas like sockets and switches.
Conclusion: Time to Shine!
Now that you know how to effectively plaster around sockets and switches, you’re one step closer to achieving the flawless finish your London home deserves! Whether you're tackling a DIY project in Islington or refreshing a rental property in Clapham, attention to detail will elevate your space. Remember, don’t hesitate to reach out to professionals if you feel overwhelmed; sometimes, a little expert touch can save you time and hassle.
If you’re ready to take your project to the next level, or you have further questions, visit London Plastering Service for a consultation today! Transforming your home starts with the right tools, techniques, and sometimes, a little help from the experts.
Related Plastering Guides & Services
Need Professional Plastering?
Get expert plastering services in London. Free quotes within 60 minutes.