
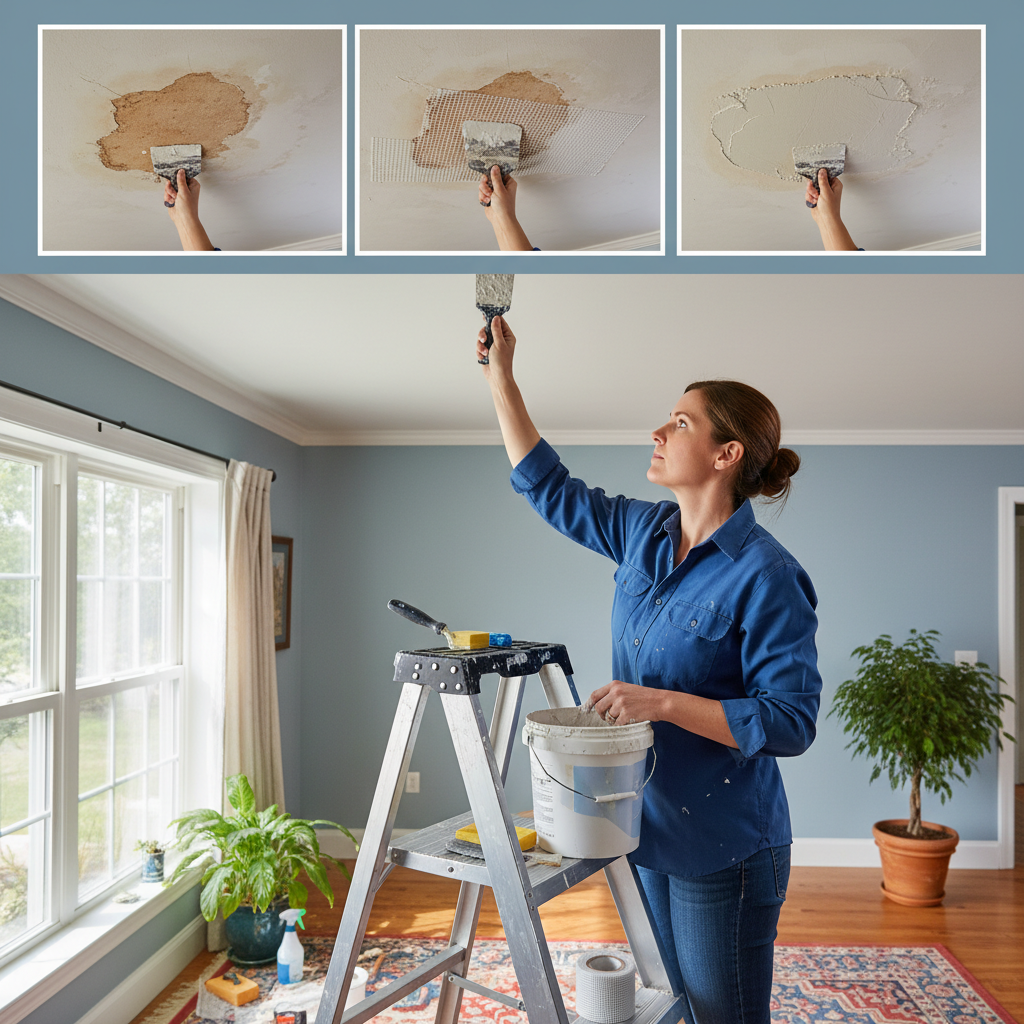
How to Repair Water Damaged Plaster Ceiling: A Step-by-Step Guide
How to Repair Water Damaged Plaster Ceiling: A Step-by-Step Guide
There’s nothing quite as startling as that ominous drip, drip, drip when you’re cozy in your living room on a rainy London afternoon. Your heart sinks as you notice the telltale signs of water damage on your beautiful plaster ceiling. But don’t worry! You’re not alone. Many London homeowners face the same challenge, especially in our famously damp climate. Fortunately, with the right tools and guidance, you can restore your ceiling to its former glory without breaking the bank.
Identifying the Damage
Before diving into repairs, it’s essential to assess the extent of the water damage. Here’s how you can evaluate the situation:
- Check for Staining: Look for yellow or brown stains on the ceiling—these are signs of moisture issues.
- Touch Test: Gently press on stained areas. If the plaster feels soft or mushy, it indicates deeper damage.
- Look for Cracks: Inspect for cracks or bulges in the ceiling which might require more than a simple patch job.
Once you've assessed the damage, it’s time to act swiftly to prevent further deterioration. Depending on the severity, you have a few options which we will lay out in this guide.
Supplies You Will Need
To successfully repair a water damaged plaster ceiling, gather the following tools and materials:
- Plaster repair kit or plaster compound
- Putty knife
- Sandpaper (medium and fine grit)
- Primer and paint (matching your ceiling)
- Ladder
- Drop cloths
- Bucket for debris
Step-by-Step Repair Process
Follow these steps to repair your water damaged plaster ceiling effectively:
Step 1: Prepare the Area
- Move furniture away from the workspace.
- Lay drop cloths on the floor to catch debris.
- If ceiling paint is peeling, gently scrape it off with your putty knife.
Step 2: Remove Damaged Plaster
- Use a utility knife or chisel to remove any loose or damaged plaster around the affected area. Be sure to wear a mask to avoid inhaling dust!
- Carefully create a square or rectangular shape for a smoother repair process.
Step 3: Clean the Area
- Remove any remaining dust and debris using a damp cloth. Let the area dry completely. It’s crucial to ensure all moisture is gone before proceeding to the next steps.
Step 4: Apply Plaster Compound
- Mix your plaster compound according to the manufacturer’s instructions.
- With your putty knife, apply the compound into the cleaned area. Smooth it out as best as you can, ensuring it’s level with the existing ceiling.
- Allow it to dry completely. This typically takes around 24 hours but may vary based on the product used.
Step 5: Sand the Area
- Once dried, use medium-grit sandpaper to smooth the surface. Follow up with fine-grit sandpaper for a flawless finish.
- Always wear protective gear when sanding.
Step 6: Prime and Paint
- Apply a coat of primer over the repaired area to seal it and prepare it for painting.
- Once the primer dries, paint the area using matching ceiling paint. Depending on the paint type, you may need two coats for complete coverage.
Pro Tip: Community Recommendations
For those living in areas like Hackney or Southwark, it’s a good idea to reach out to local plasterers if you're not comfortable executing the repairs yourself. Sometimes, especially for extensive damage, hiring a professional ensures long-lasting results.
Practical Tips for Homeowners
- Prevent Moisture Issues: Maintain regular checks of your roof, pipes, and plumbing to prevent leaks.
- Ventilation is Key: Ensure adequate ventilation in bathrooms and kitchens to reduce humidity and avoid water damage.
- Regular Maintenance: Schedule periodic inspections of your plaster ceilings, especially after heavy rain.
FAQ
Q1: How much does it cost to repair a water damaged plaster ceiling in London?
A1: Repair costs can vary widely. For a small section, expect to pay between £100-£300. Extensive damage requiring professional help may cost upwards of £500-£1000.
Q2: Can I do the repairs myself or should I hire a professional?
A2: If you're handy and the damage is minimal, DIY repairs are feasible. However, for extensive damage or if you're unsure, it’s best to contact professionals from London Plastering Service for expert support.
Q3: How can I prevent further water damage to my ceiling?
A3: Ensure your roof, gutters, and drainage systems are in good condition. Consider using a dehumidifier in high-moisture areas of your home to minimize the risk of damage.
Q4: What are the signs of a serious leak?
A4: Look for widespread staining, sagging ceilings, and consistent dripping sounds. If you see these signs, contact a professional to inspect the source immediately.
Q5: How long does it take for plaster to dry completely?
A5: Depending on the thickness and humidity, plaster can take between 24-72 hours to dry fully. Always follow the manufacturer's recommendations for best results.
Conclusion
Repairing a water damaged plaster ceiling doesn’t have to be a daunting task. With the right approach, tools, and a little patience, you can restore your ceiling to perfect condition. If your ceiling is beyond DIY repair or you prefer to leave it to the experts, don’t hesitate to reach out to our professional team at London Plastering Service. Let us help protect your home from further water damage and ensure your living space looks as good as new.
For inspiring ideas and to see our work, visit our Gallery of completed projects. For more tips, check out our Blog for further plastering insights!
Related Plastering Guides & Services
Need Professional Plastering?
Get expert plastering services in London. Free quotes within 60 minutes.